Maintaining Data in the Application
The ADIB Portal Station provides users with the ability to directly maintain product data within the application interface. This includes editing product details, correcting errors, managing classifications, adjusting workflow statuses, and removing outdated entries. Unlike the Excel export–import process, which is best suited for large-scale changes, maintaining data directly in the portal is ideal for quick updates, small corrections, or individual product adjustments. With intuitive navigation, filters, and a tree-based hierarchy view, users can easily locate products, review their details, and apply changes in real time. This ensures that product information remains accurate, consistent, and up to date, supporting efficient operations and reliable reporting across the system. Please not that only 'edit portals' provide the possibility of editing data directly, in comparison with search 'search portals' which allow users to search and view products.
1. Overview
- Direct maintenance is designed for day-to-day product management.
- All changes are performed in the portal and saved immediately.
- Permissions determine which users can view, edit, or delete products. For more information on permissions and users see section ADIB-PortalStation > Management via the Portal Manager > Creating user groups and users of the documentation.
2. Finding and Opening Products
Before you can maintain data, locate the product(s) you want to update:
- Switch to Tree View or Filter View if you want to navigate through the hierarchy and locate products by parent–child structure.
- Apply filters (e.g., by class, status, or attribute) to narrow down results.
- Use the search bar for quick access.
- Switch from Grid View, List View, Table View or Flexible View.
- Change the language of the interface (if configured by consultant).
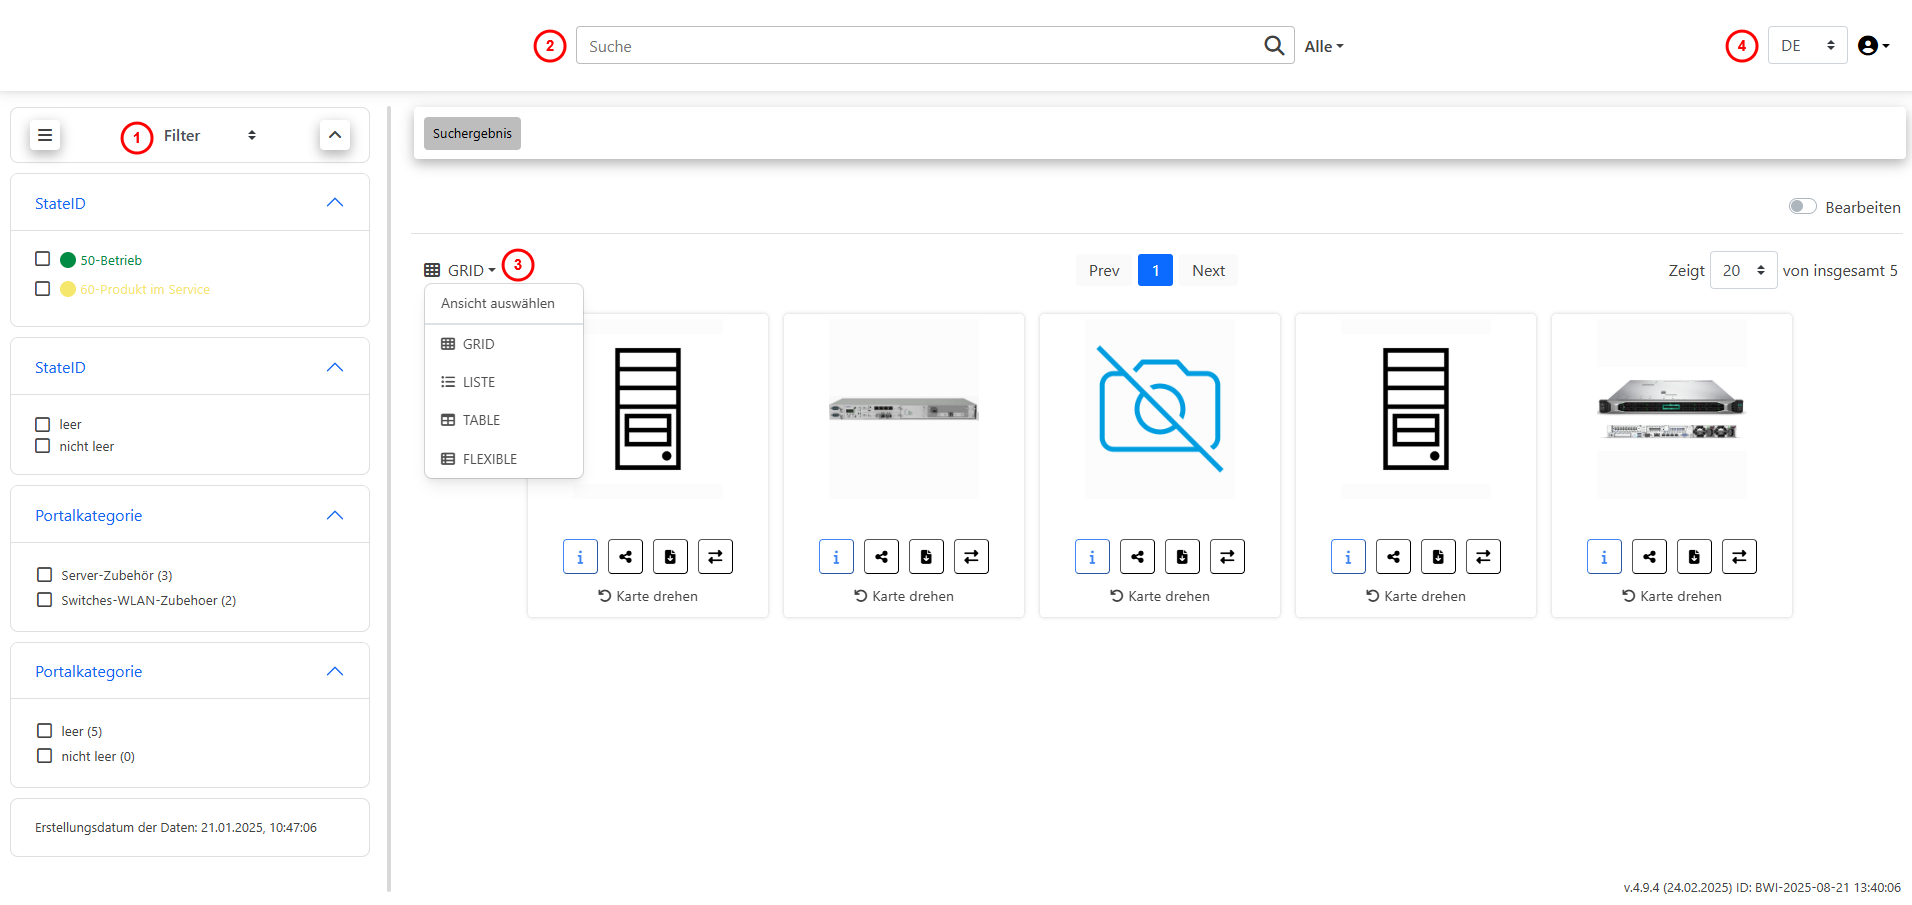
(Image: Filter, search and view navigation)
3. Editing Product Data
To edit a product:
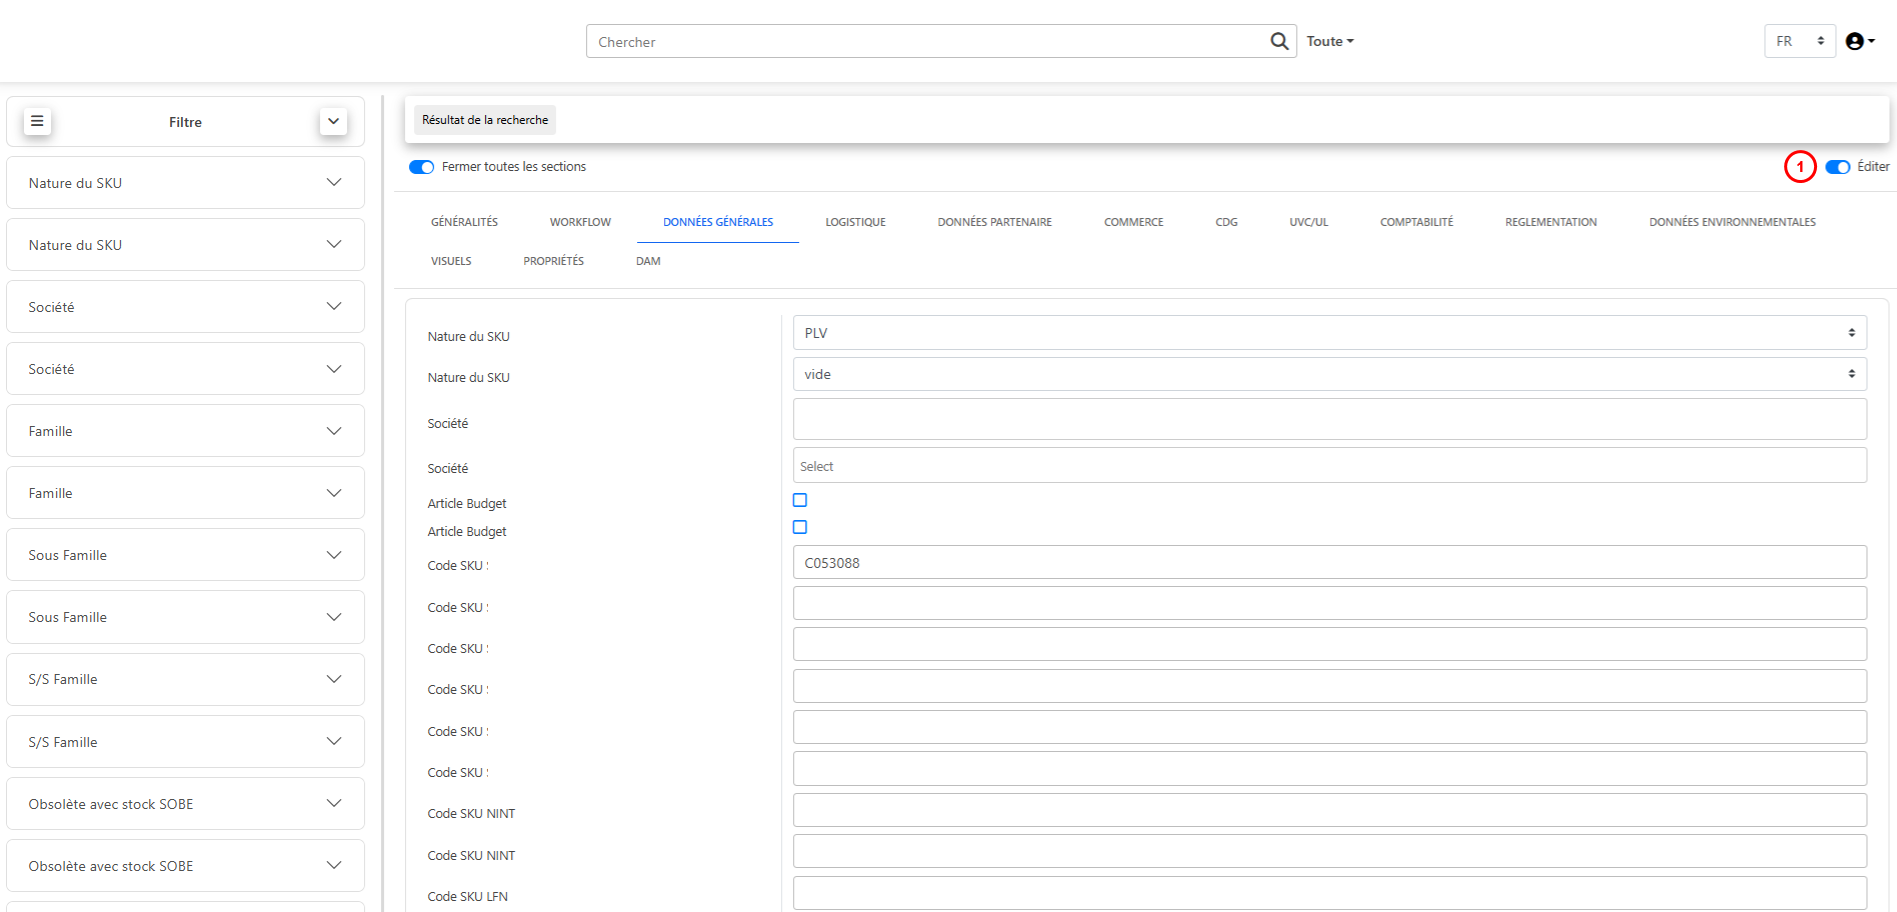
- Open the product detail page.
- Fields and attributes are displayed based on the assigned product class.
- Toggle the edit button to make the data editable.
- Make the necessary changes:
- Basic attributes (e.g., name/label, description, workflow status).
- Complex attributes (e.g., subtables, references).
- The system validates mandatory fields and field types.
- Click Save to apply the changes.
4. Deleting Products
Products that are no longer needed can be deleted from the portal.
- Toggle the edit button at the top right side of the screen (see step one in below image).
- Select the product you want to remove.
- Use the Delete option from the product actions menu (see step two in the below image).
- Confirm the deletion when prompted.
Important:
- Deleting a product cannot be undone.
- Products that are linked as references or parents may need to be unlinked first.

5. Managing Product Hierarchies
Products can belong to hierarchies where one product serves as a parent to others.
- Switch to Tree View to see the hierarchy structure.
- Expand or collapse levels to navigate.
- To assign a product under a new parent, edit its ParentID field.
- Use the tooltip (hover over elements) to identify a parent’s ID and Label.
- The available workflow statuses are predefined and cannot be adjusted independently.
- If additional statuses are required, please contact your ADIB consultant.
6. Changing a Workflow Status
Prerequisites
- Workflow statuses can only be configured by a consultant.
- Status definitions can only be changed on the ADIB Central Station.
- The following steps explain how to change an existing workflow status for a product from the EditPortal.
Steps to Change the Workflow Status
1. Activate Edit Mode
- Make sure the Edit toggle (top right) is switched on. (See marker 1 in the screenshot)
2. Open the Workflow Menu
- Click the menu icon next to the current status (e.g., “50-Betrieb”). (See marker 2 in the screenshot)
3. Select a New Workflow Status
- In the dropdown menu, choose the desired next status, for example:
- Manufacturer EOL → if the product has been discontinued by the manufacturer.
- Customer EOL → if the product is decommissioned on the customer side.
- Other actions (such as Generate product data sheet) may also be available. (See marker 3 in the screenshot)
4. Confirm the Change
- After selecting the new status, the change will be saved, and the product will display the updated workflow status.

7. Best Practices
- Always double-check mandatory fields before saving.
- Keep product labels and classifications consistent.
- Use Tree View to verify correct placement in hierarchies.
- Coordinate with other editors to avoid conflicting updates.
- Delete products cautiously to prevent breaking references.