Generation of documents
Documentation Generation – Template Designer
Overview
The Template Designer feature allows users to create and configure templates for Word documents within the ADIB Portals. These templates define a structure of attributes, information, and images that can later be used to automatically generate documents for any product. Once a template is created and added to the Template Library, it can be reused to generate documents for multiple products.
Accessing the Template Designer
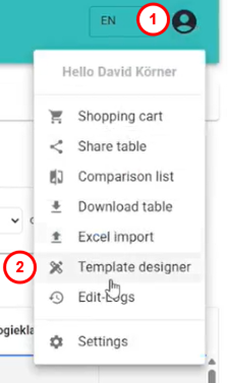
- Click your profile icon in the top-right corner of the screen.
- Select Template Designer from the drop-down menu.
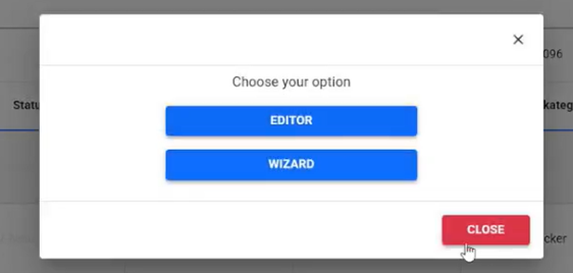
The Template Designer window opens, offering two modes:
- Editor : A detailed, drag-and-drop design tool that lets you build and customize Word document templates with full control over layout and formatting.
- Wizard A guided setup tool that simplifies template creation by helping you quickly select fields and apply consistent styling through a simple interface. (PDF or Word?)
Once you have opened the template Designer you will be prompted to choose between these two options.
Modes of the Template Designer
Template Editor Mode
The Editor provides a detailed, drag-and-drop interface for designing Word-document templates.
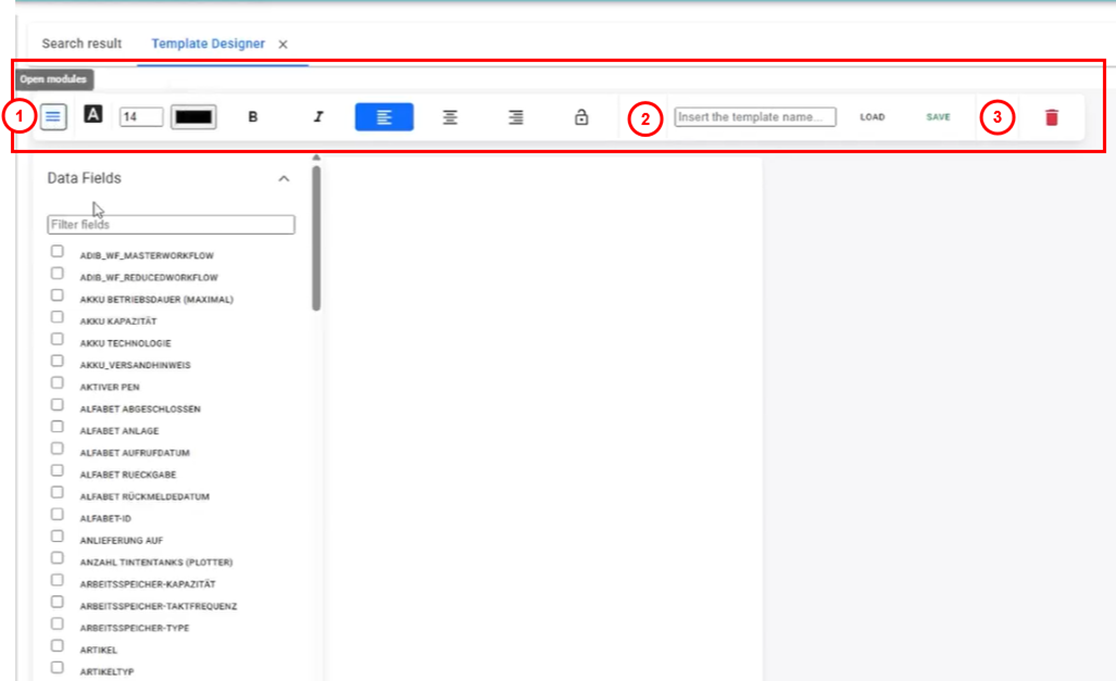
Steps:
- Click the burger menu (☰) to open the list of available data fields.
- Drag and drop desired fields into your document.
- Customize text formatting (font, size, color, bold, italics, and alignment of your text).
- Use the lock icon to lock or unlock formatting settings.
- Enter a template name, load it into the options list, and click Save when satisfied.
- Use the trash-can icon to delete a template.
Note: Editor mode is used exclusively for creating Word-document templates.
Template Wizard Mode
The Wizard mode provides a simplified interface for quick template setup and styling. (It includes two main panels:
- Field Selection – choose which data fields to include.
- Style Selection – customize the document’s overall look and feel.
Field Selection Options : The Field Selection panel allows users to define which elements appear in the generated document and how they behave.
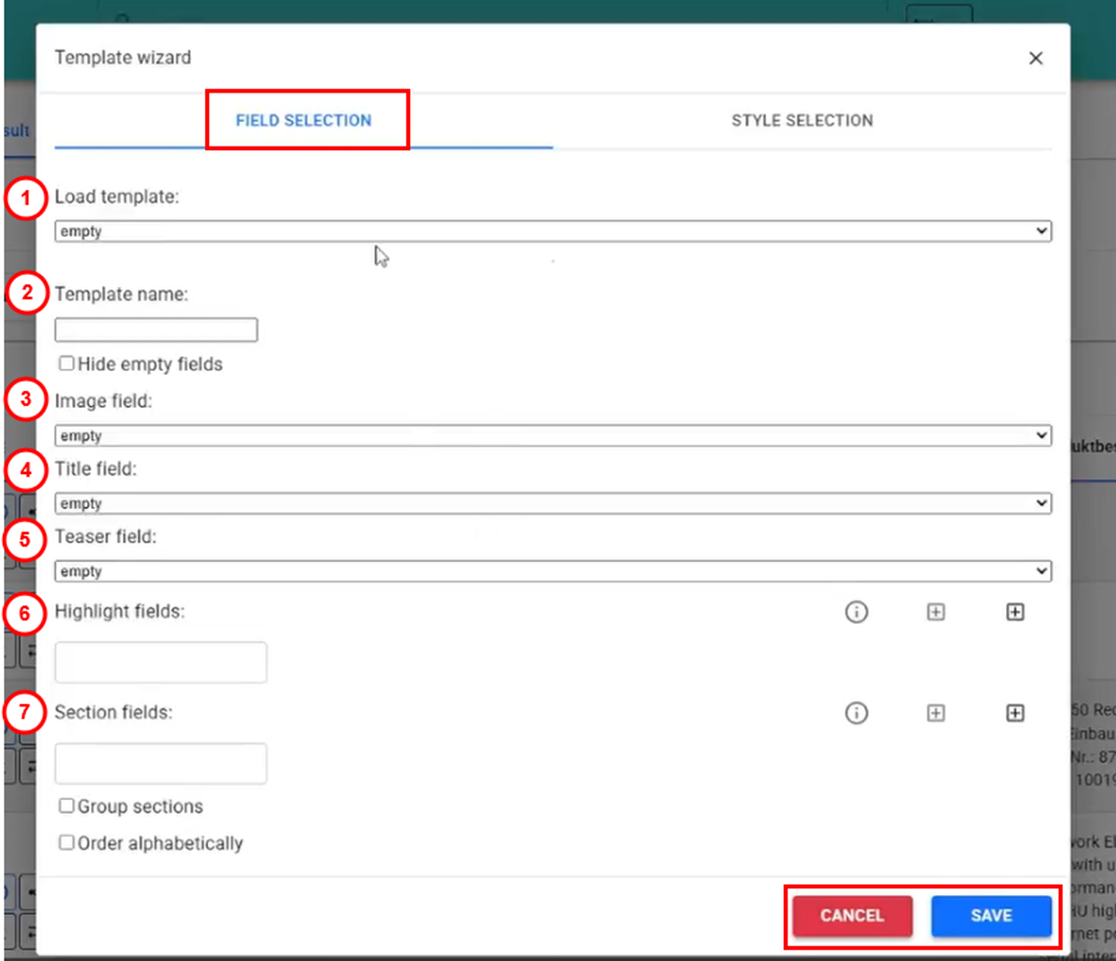
- Load Template – Load an existing template to modify or reuse it.
- Template Name – Assign a name to your new or edited template before saving.
- Toggle to Hide Empty Fields – Enables you to automatically hide any fields that contain no data in the generated document.
- Image Field – Insert an image placeholder (e.g., product photo, logo, or asset image).
- Title Field – Define the document’s main title field; typically the product or report title.
- Teaser Field – Add a short introductory or descriptive text area under the title.
- Highlight Fields – Mark certain data fields to be visually emphasized in the document (e.g., bold or color highlights).
- Section Fields – Organize content into groups or choose to order fields alphabetically for easier navigation and readability. Group sections into tables (or separate).
Style Selection Settings
These options control the visual appearance of different parts of the generated document:
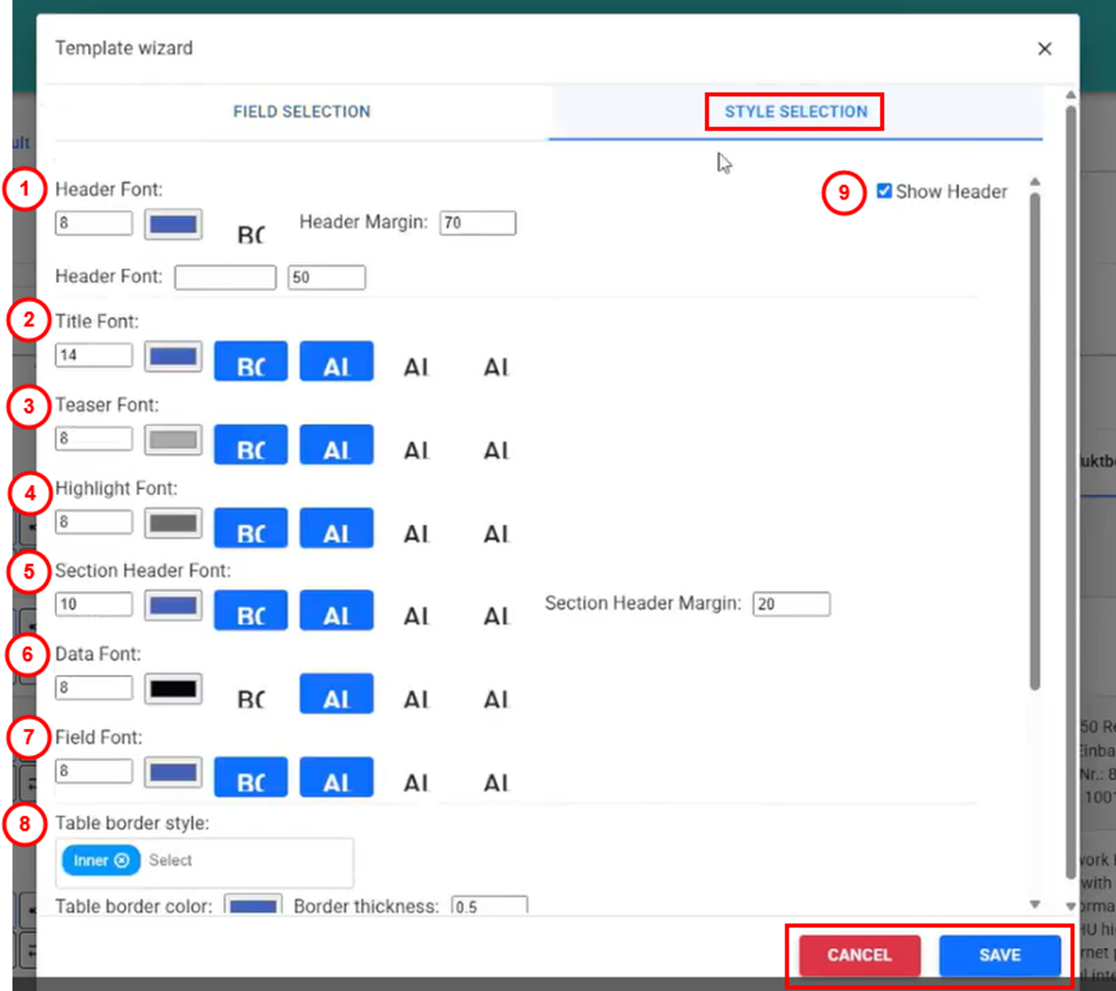
- Header Font – Sets the font style and size for the document header, typically containing company logos or page titles.
- Title Font – Determines how the main document title appears (font type, size, and weight).
- Teaser Font – Defines the appearance of introductory text or short summary paragraphs beneath the title.
- Highlight Font – Controls the formatting used to emphasize key phrases or data points within the document.
- Section Header Font – Sets the font style for section or chapter headings to visually separate content areas.
- Data Font – Specifies the default text style for data fields inserted from the system (e.g., product names, IDs, or prices).
- Field Font – Determines the appearance of field labels that describe each piece of inserted data.
- Table Border Style – Defines the line style and thickness used for table borders in the document.
- Show Header – Toggles whether a header section appears at the top of each page in the generated document. This is only editable in the Central Station and by default displays the logo, company name and date.
Note: Editor mode is used exclusively for creating PDF-document templates.
Summary The Template Designer gives users full control over the structure and appearance of generated Word documents. Use the Editor for advanced layout customization of word document templates, or the Wizard for a faster, guided setup experience and for PDF generation.