Media-Manager
Media-Manager
The ADIB Media Manager is a tool that enables remote access to files generated by integration clients in different customer environments (such as production, pre-production, or UAT). Each customer instance is connected to an integration client, which executes scheduled jobs based on configurations from the Central Station. While the Central Station manages job schedules, it does not have direct access to the data processed—this is handled entirely by the integration clients installed on customer servers. Since accessing these servers usually requires navigating secure networks like VPNs and proxies, retrieving files can be complex. The Media Manager addresses this by offering a user-friendly interface that provides direct access to the file system of integration clients, without needing to manually access the customer’s server. This improves efficiency, simplifies troubleshooting, and enhances visibility across project environments.
Requirements for successful use of the Media Manager module :
- The integration client must be the the version IC V2 or more recent (Legacy IC not supported).
- All relevant instances must show a green status in the dashboard, meaning that they have recently connected to the integration client in order to properly use the Media Manager module.
Navigating the Media Manager
Step 1: Access the Media Manager
- Log in to Central Station.
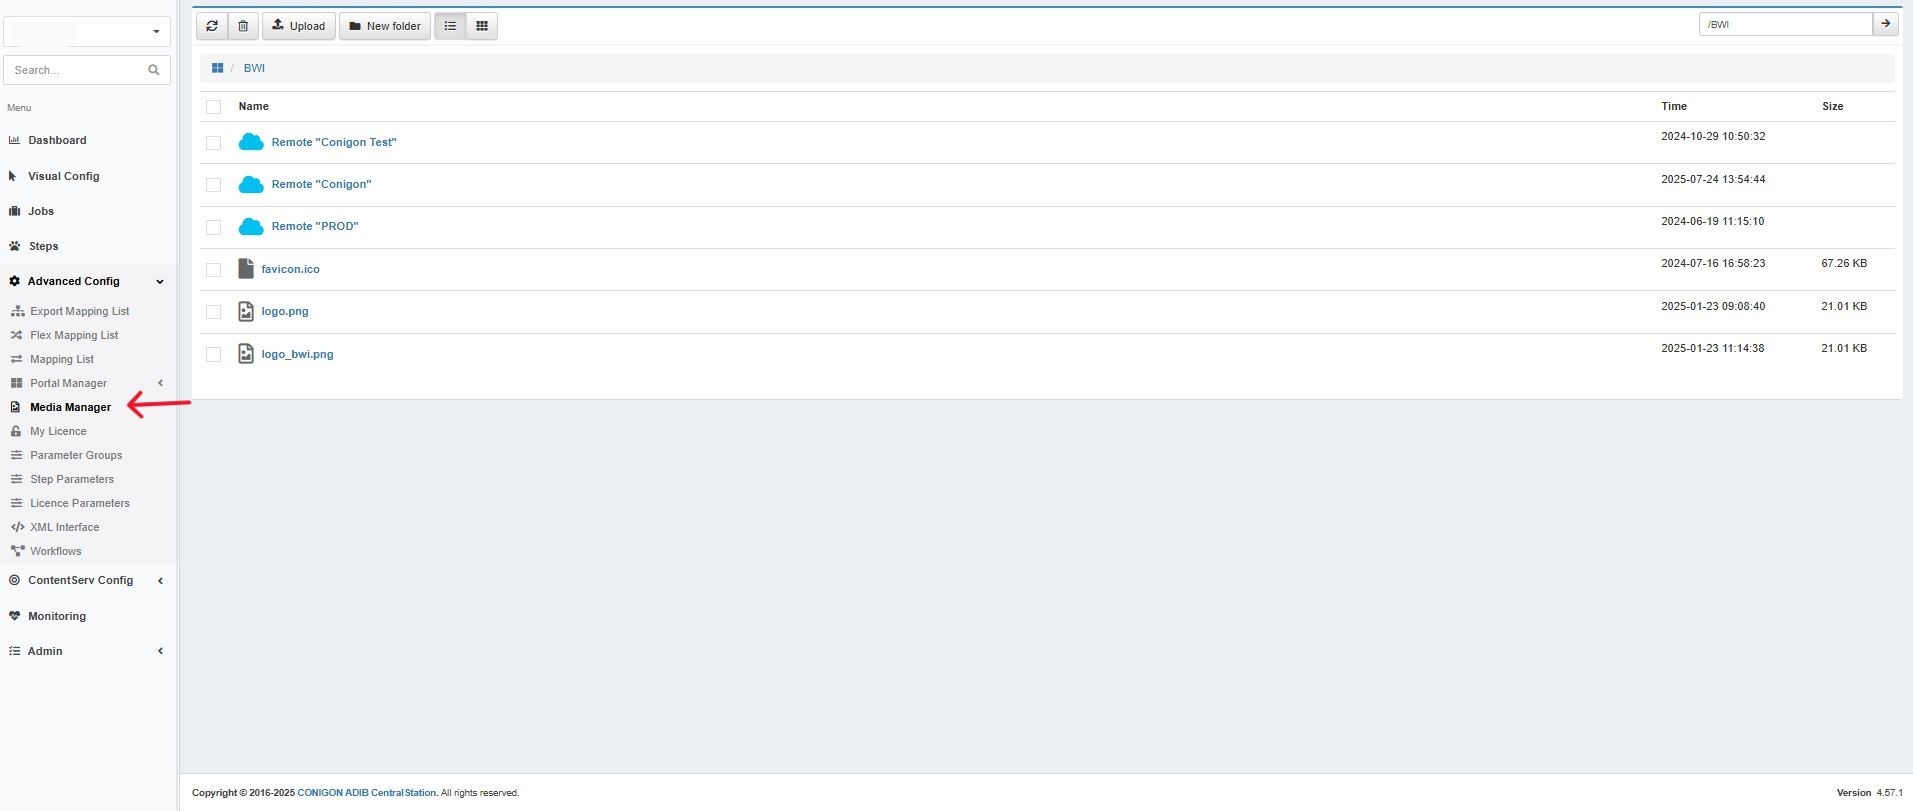
- Navigate to the Media Manager module.
- You will see a list of blue cloud icons representing the file systems of each integration client instance.
 Step 2: Connect to an Instance
- Click the blue cloud icon next to the instance you wish to access.
- This will open the file system for that instance.
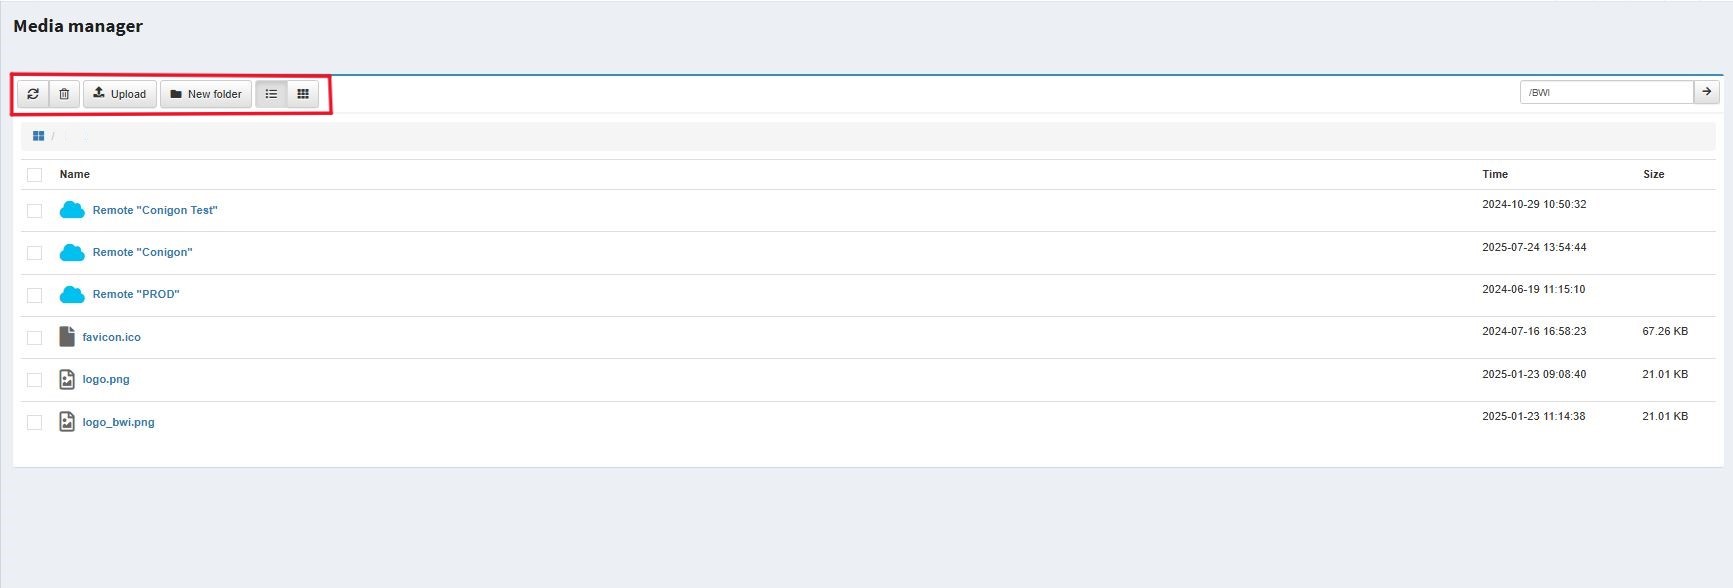
- On the top bar you will see the options to : refresh, delete, upload, create new folders, list view and grid view. You can also see in the time column a log of when a file was last changed, and a column stating file size.
Understanding the File System
- The root folder displays all available folders and files from the integration client.
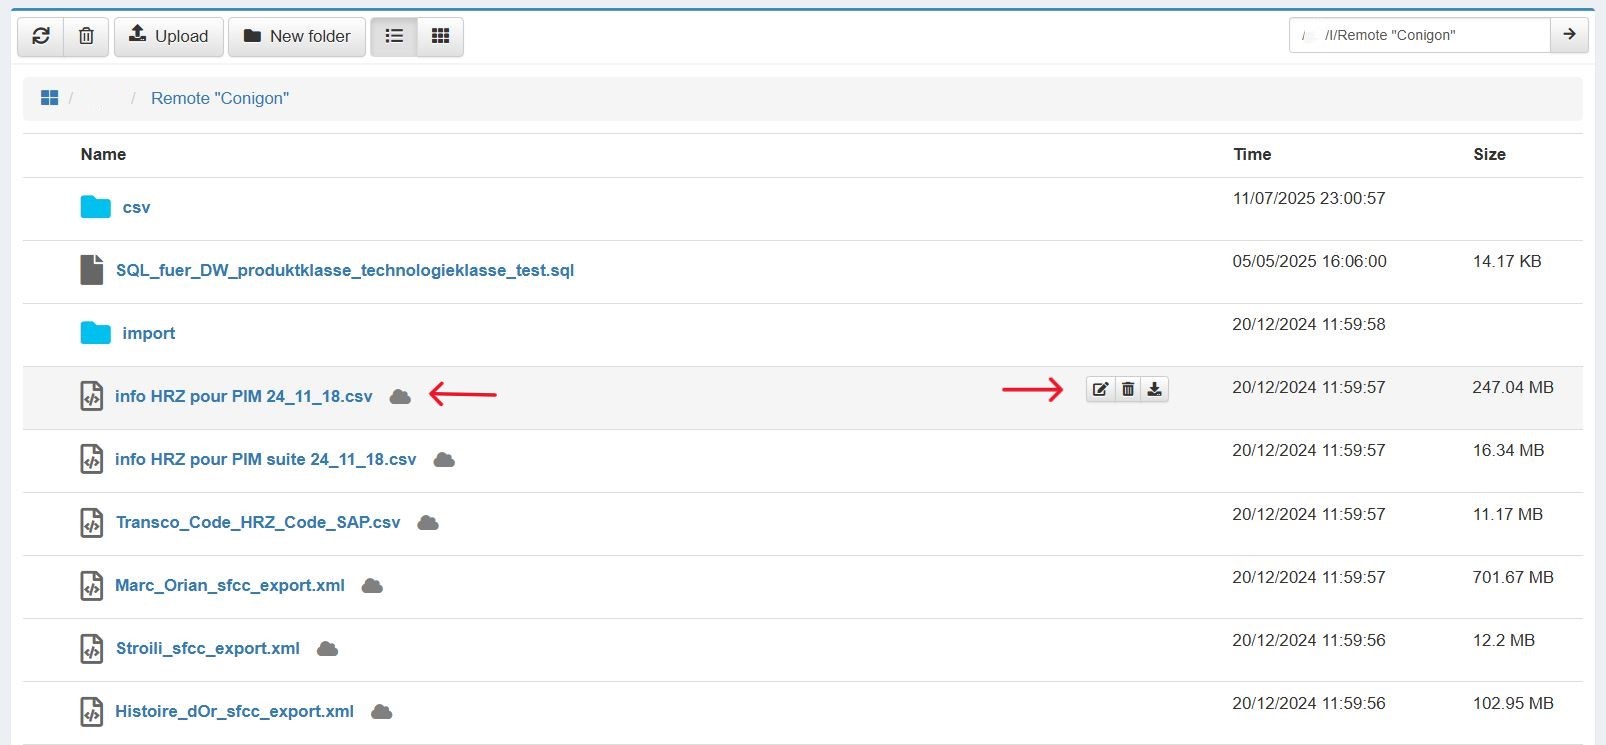
- A cloud icon next to a file indicates that the file is stored remotely.
- Files without a cloud icon are already available locally and can be accessed directly.
Downloading Files
- After you have selected the required instance, select the file you would like to download and click on the cloud icon next to the file name. Users also have the option to download by clicking on the download button.
- A circle loading indicator will appear indicating the download is processing. Once the file is downloaded, a success green message will display stating 'download successful.'
- The page will refresh, and the cloud icon will disappear next to the file.
- You can rename & move, delete, or download the file using the action icons. Only one file can be renamed & moved, deleted or downloaded at a time.
- You may also click on the file name directly to initiate the download if the file is stored locally.
Tip: Always refresh the page after uploads, downloads, or any job execution to ensure you are viewing the most up-to-date content.
Uploading Files
- Files can be uploaded to the selected instance directly from your computer.
- File size is limited: Uploads and downloads are reliably supported under 500 MB.
- To upload a file select the instance you would like to upload the file to. Multiple files can be uploaded at a time.
- Click on the upload button on the top task bar.
- When the file is successfully uploaded you will receive a green pop up message at the top of the screen stating 'upload successful.'
- If the upload is unsuccessful a red pop up message at the top of the screen will state 'upload unsuccessful.'
If upload fails, try compressing or splitting the file.
Renaming and Moving Files
The Media Manager allows users to rename or relocate files directly within the integration client's file system. This is particularly useful for organizing job outputs or preparing files for reprocessing in different folders. Follow these steps to rename or move a file:
- Select the file you want to rename or move.
- Click the Edit icon (the pencil symbol) next to the file name.
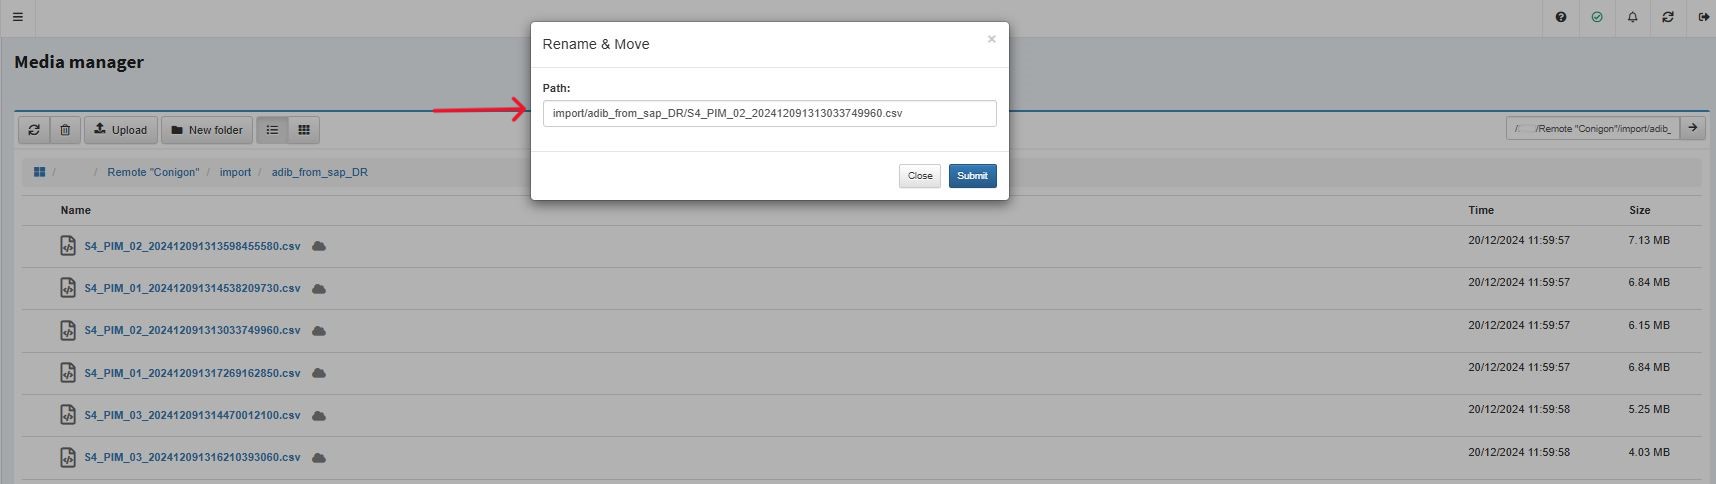
- A dialog box will appear showing:
- The full file path (displayed using forward slashes /)
- The file name
To Move a File:
- Modify the file path by editing the folders before the last slash.
- If the specified folder does not already exist, it will be created automatically upon saving.
To Rename a File:
- Change only the text after the last slash, which represents the file name.
- Make sure not to alter the file extension (e.g., .csv, .xml), as it may affect how the file is processed.
Example:
- Current path: root/import/adib_from_sap_DR/report.csv
- To move this file to a new folder and rename it:
- Change to: root/archive/renamed_report.csv
Importing Files from the Integration Client
In use cases where a job needs to import a file stored on the integration client's file system into an external environment such as Contentserv or SAP, this can be easily configured within the Steps section of the Central Station application.
Step 1 : Access the steps module located on the left side of the screen.
- Click on the Step within the job that is responsible for importing the file.
- In the step configuration panel, click on Step Parameters.

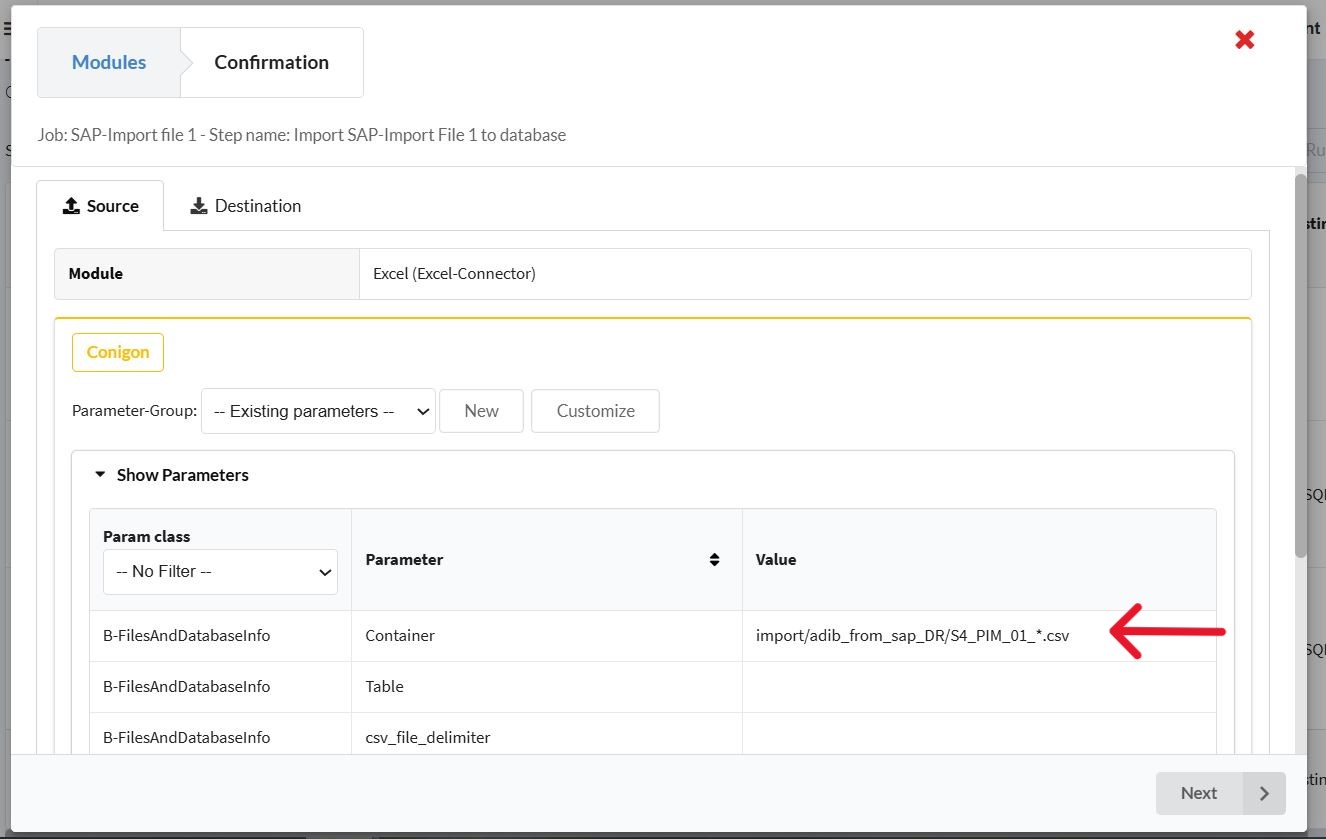
Step 2 : Configure the parameters for this step
- Then, click on Show Parameters to display the full configuration options.
- Under the Parameter Container section, locate the container field where the file name is required.
- In the value column enter the exact file name as it appears in the Media Manager. This ensures the correct file from the integration client’s folder is used during the job execution.
By configuring this parameter, the integration client will be able to fetch and process the specified file during the scheduled job execution, facilitating smooth data transfer to the target environment.
Known Limitations
- The media manager is not supported by old versions of the integration client.
- There is a file size limit for uploading and downloading (500 MB).
- Manual page refresh is required to view the latest file structure and contents.
- Only one file can be downloaded, renamed & moved, or deleted at a time.
- Multiple files can be uploaded at a time.