CSV file import via ADIB
CSV File Import via ADIB
This is only possible if the customer has access to the necessary licensed modules in ADIB. For this action you must first create a job and then create and assign a step to this job.
Creating a Job
- Start by navigating to jobs section of the application located on the left hand bar in the ADIB CentralStation.
- Click on 'new' at the top left bar to create a new job.
- Complete the following fields
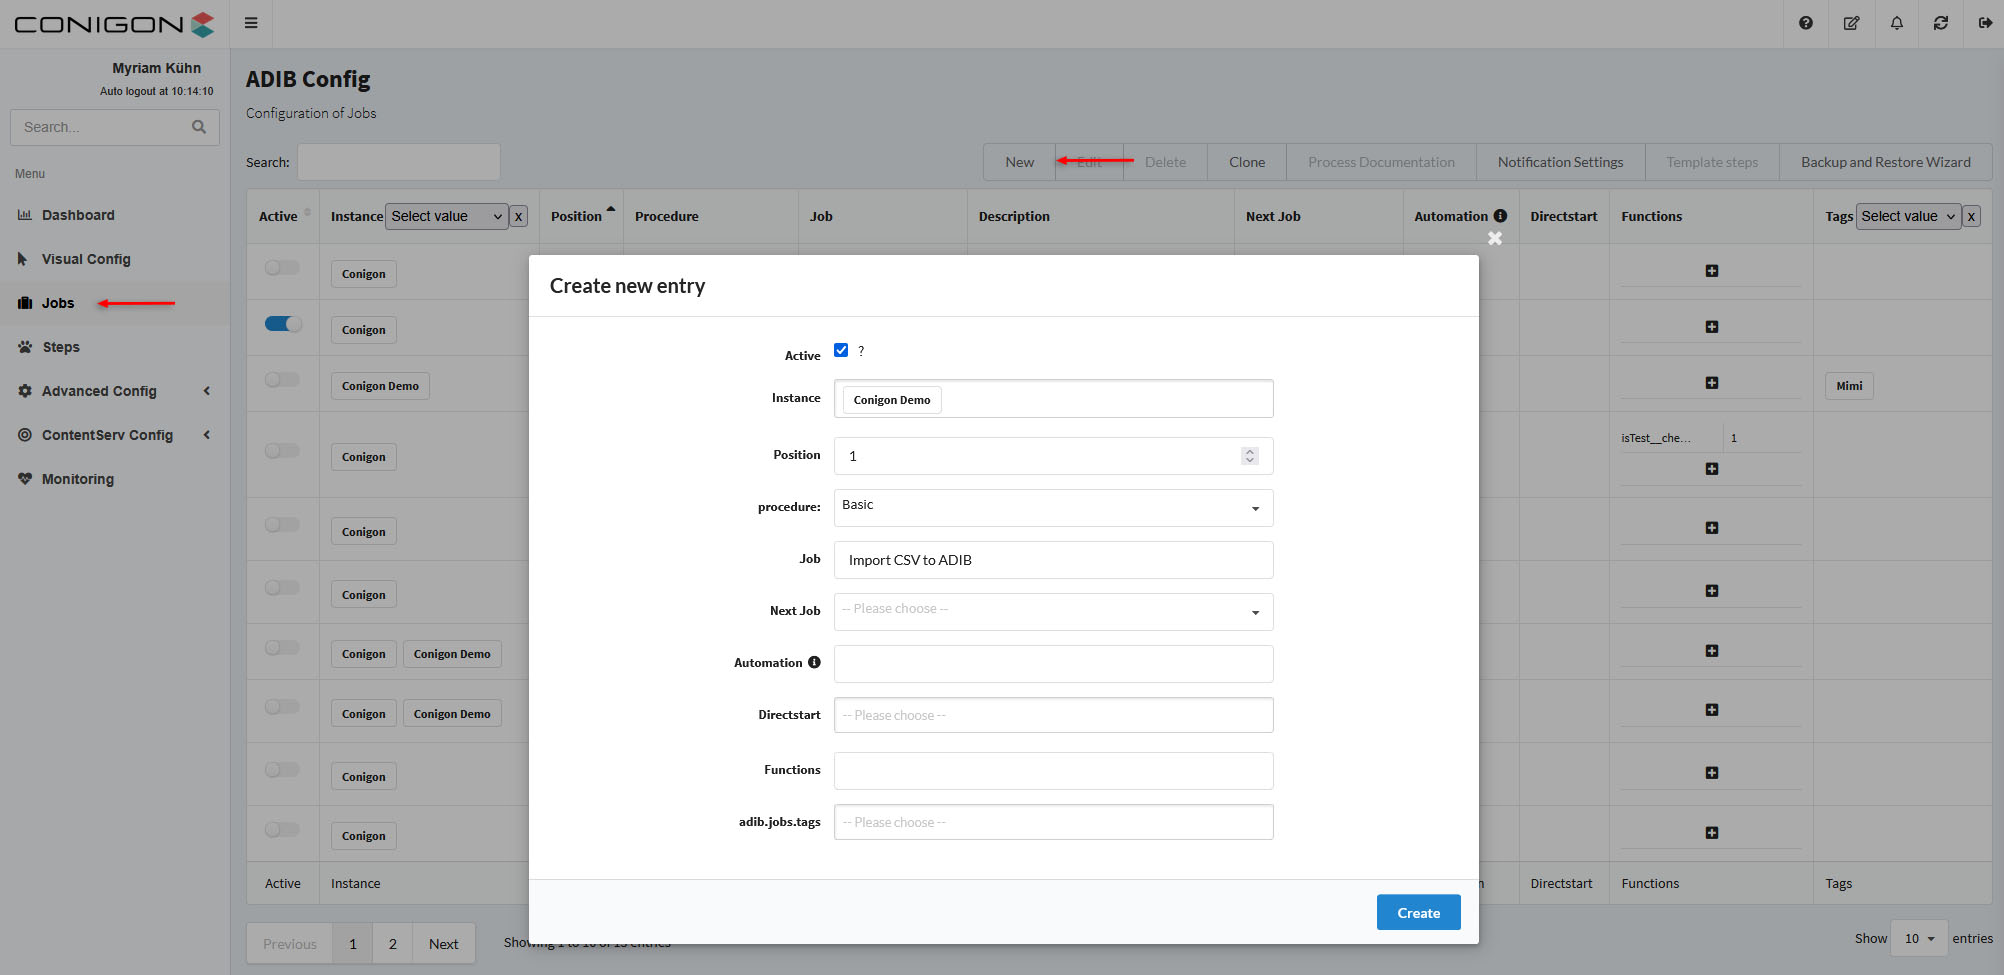
| Fields | Description |
|---|---|
| Active (mandatory field) |
Enable this field activate this job. |
| Instance (mandatory field) | Select the instance(s) that you would like this job to be run on. |
| Position | Only necessary for procedures that require multiple jobs. |
| Procedure (mandatory field) | 'Basic' must be selected. |
| Job (mandatory field) | Give a title to the job. |
| Next Job | You can indicate when you would like to start another job after this job. |
| Automation | To configure this job to run at a scheduled time. |
| Directstart | Choose the instance you would like this job to directstart. The job will only start one time from the directstart. |
| Functions | Not mandatory |
| adib.job.tags | Can place a tag on this job to help filter for this job. |
- When the fields are completed press create.
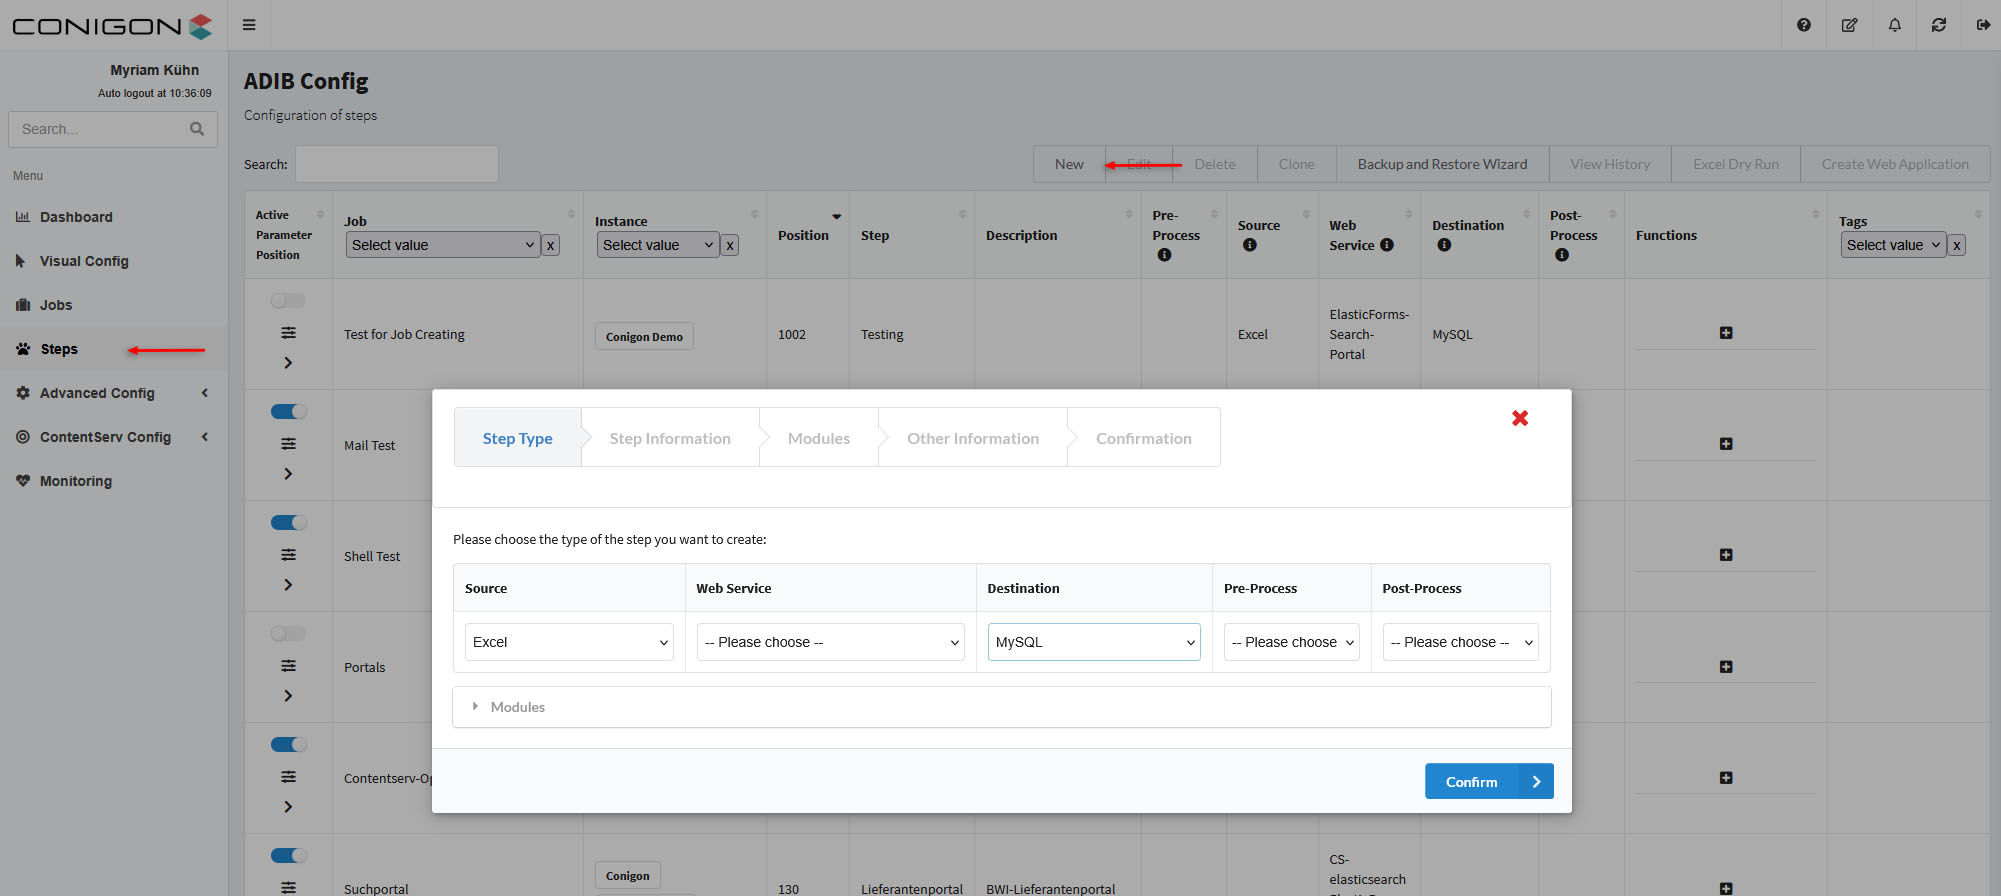
Creating a Step
- Navigate to the 'step' section of the application located on the right side of the screen.
- Click on 'new' to create a new step.
- Under 'Step Type' complete the following fields (Source -> Excel ; Destination -> MySQL) and then press confirm.
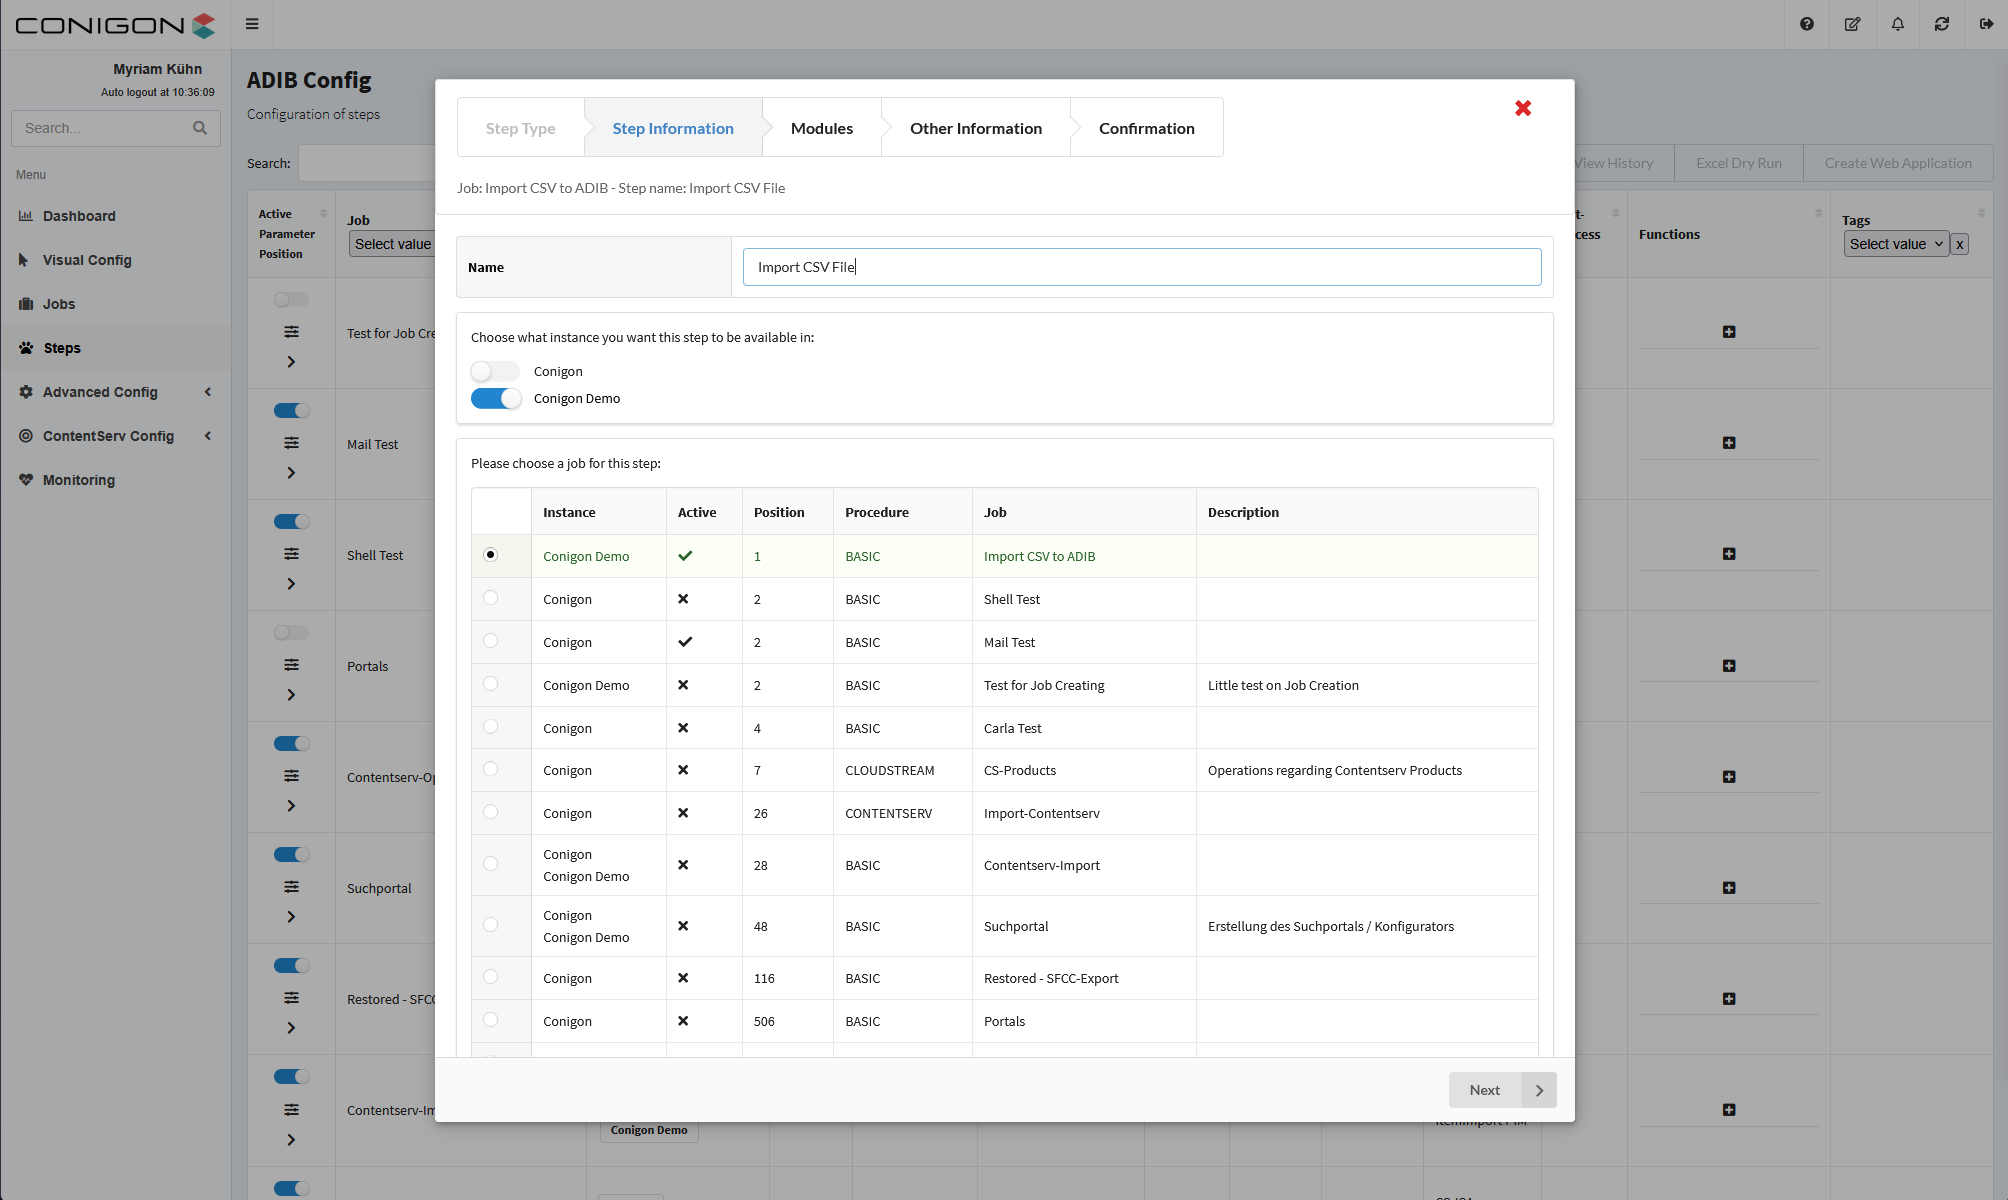
- Under 'Step Information' create a name for the step.
- Select the instance you would like this step to be available on.
- Choose the job you would like this step to be available on (the job that you created earlier).
- ATTENTION - the job and step must exist on the same instance.
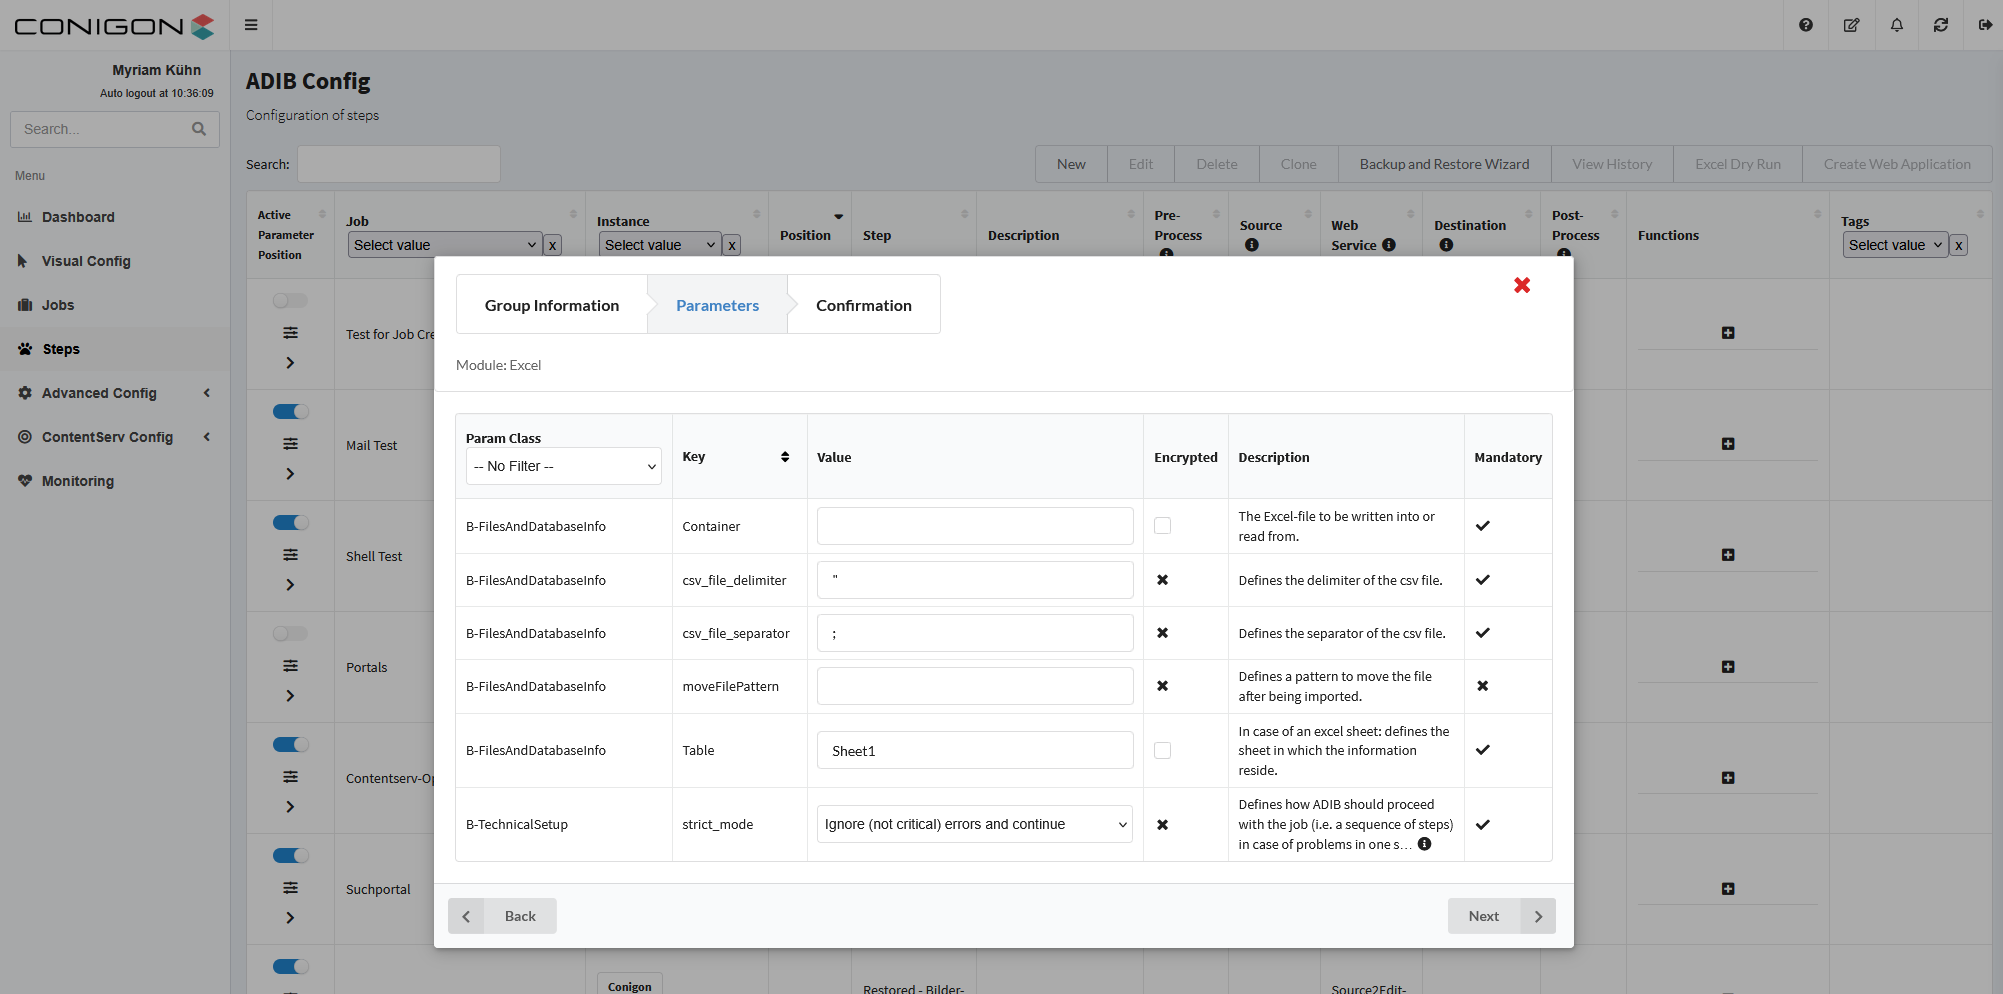
- For the source file under 'Modules' select excel module, and then press either parameter group (if you have pre-set parameter settings), or new.
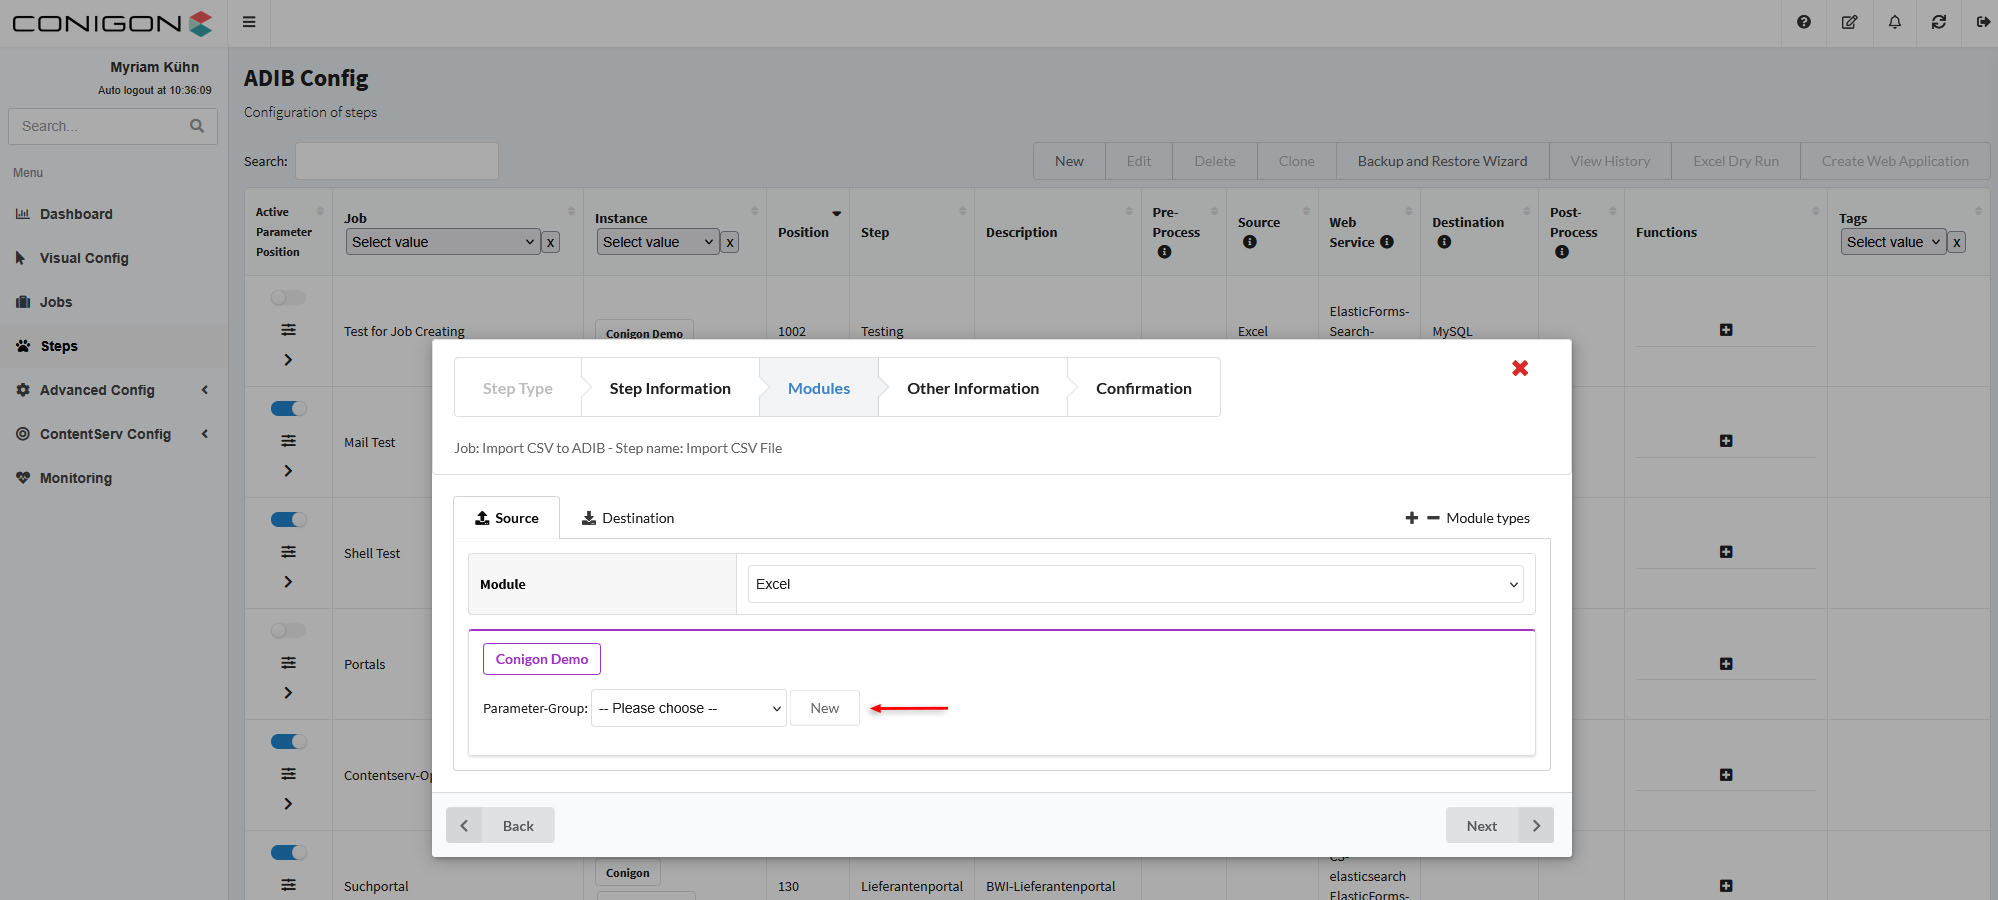
- To create a new parameter group press on 'new' and then enter a title for this step group, verify the instance, and include a description if needed.
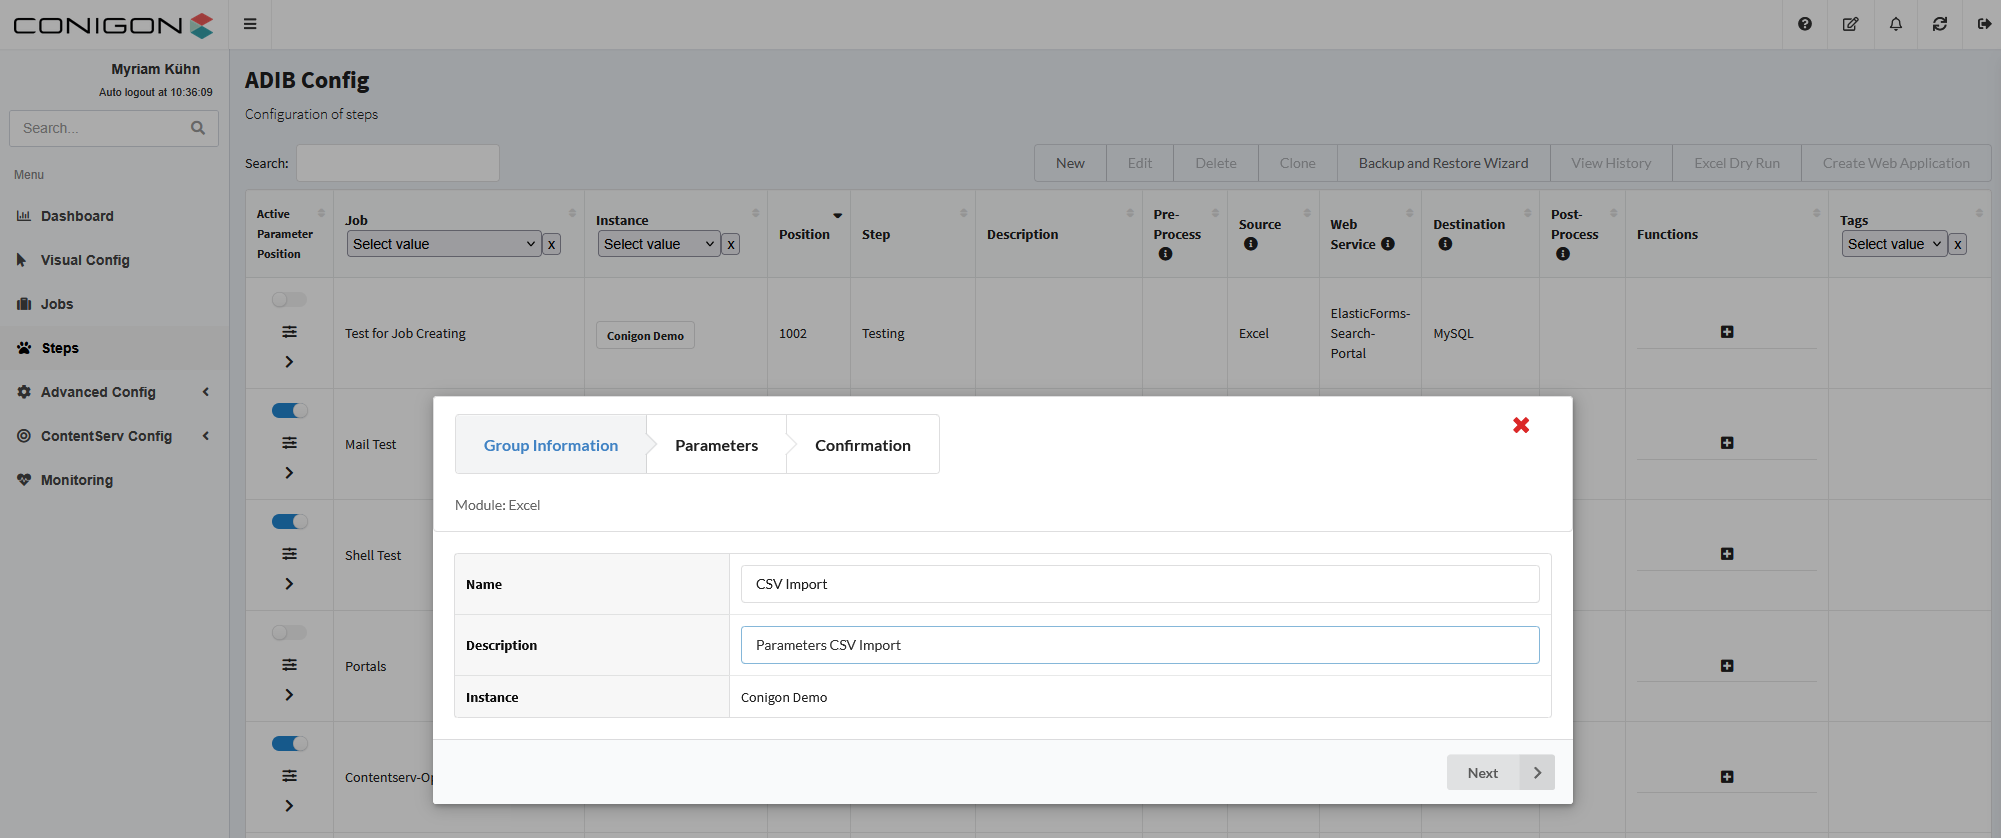
- Enter the necessary parameters and then confirm your choices.
- Indicate where the file is located, and click on next. (Mandatory to include container).
- Indicate where the file is located, and click on next. (Mandatory to include container).
- Confirm your choices and save the new parameter group.
- Now configure the destination.
- Choose the module MySQL and you have the choice of choosing a parameter group, or configuring a new group.
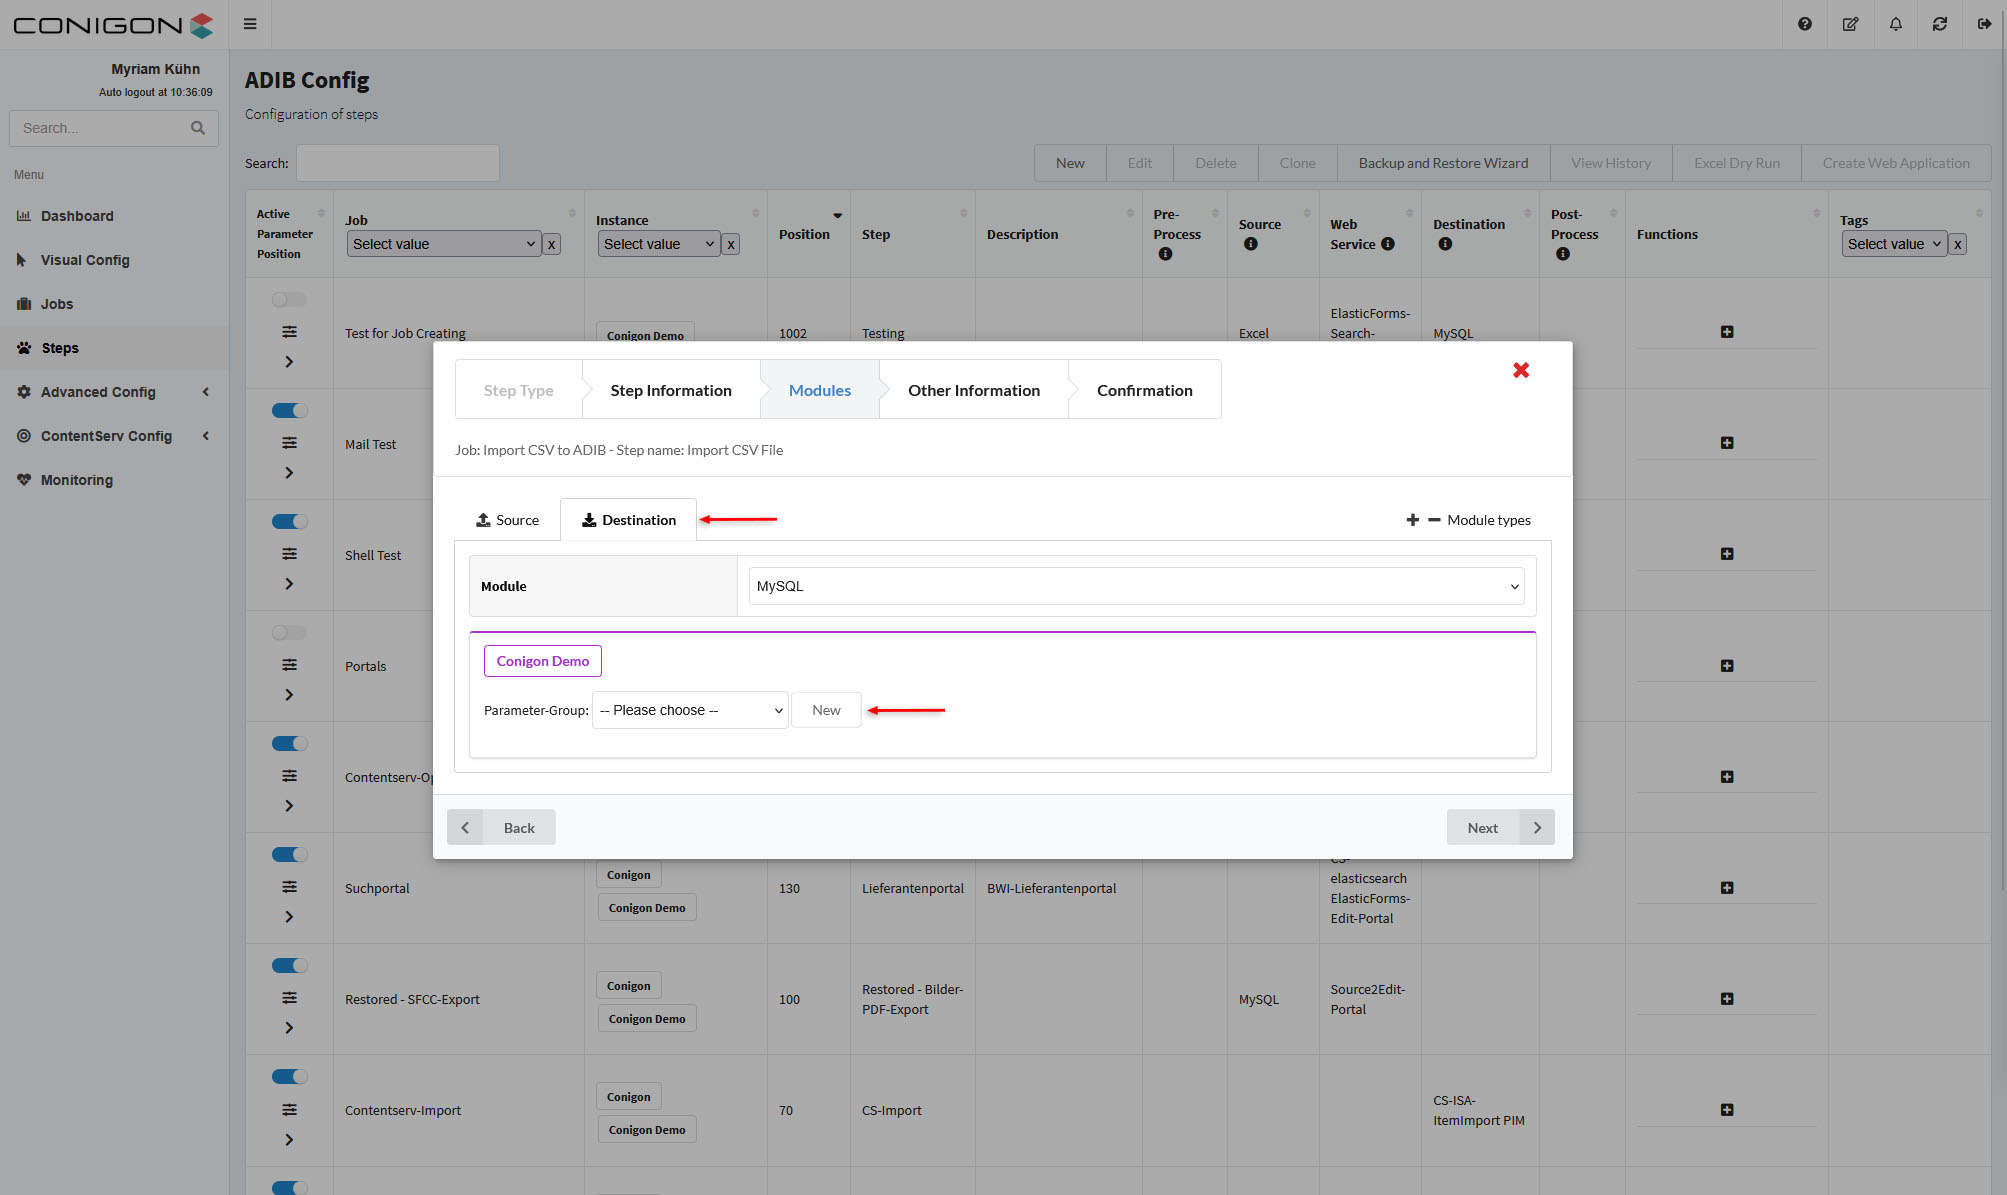
- Choose the module MySQL and you have the choice of choosing a parameter group, or configuring a new group.
- Necessary parameters are the following : host, password, port, user, connection_parameter, container table, and for createTableIfNotExists (activate).
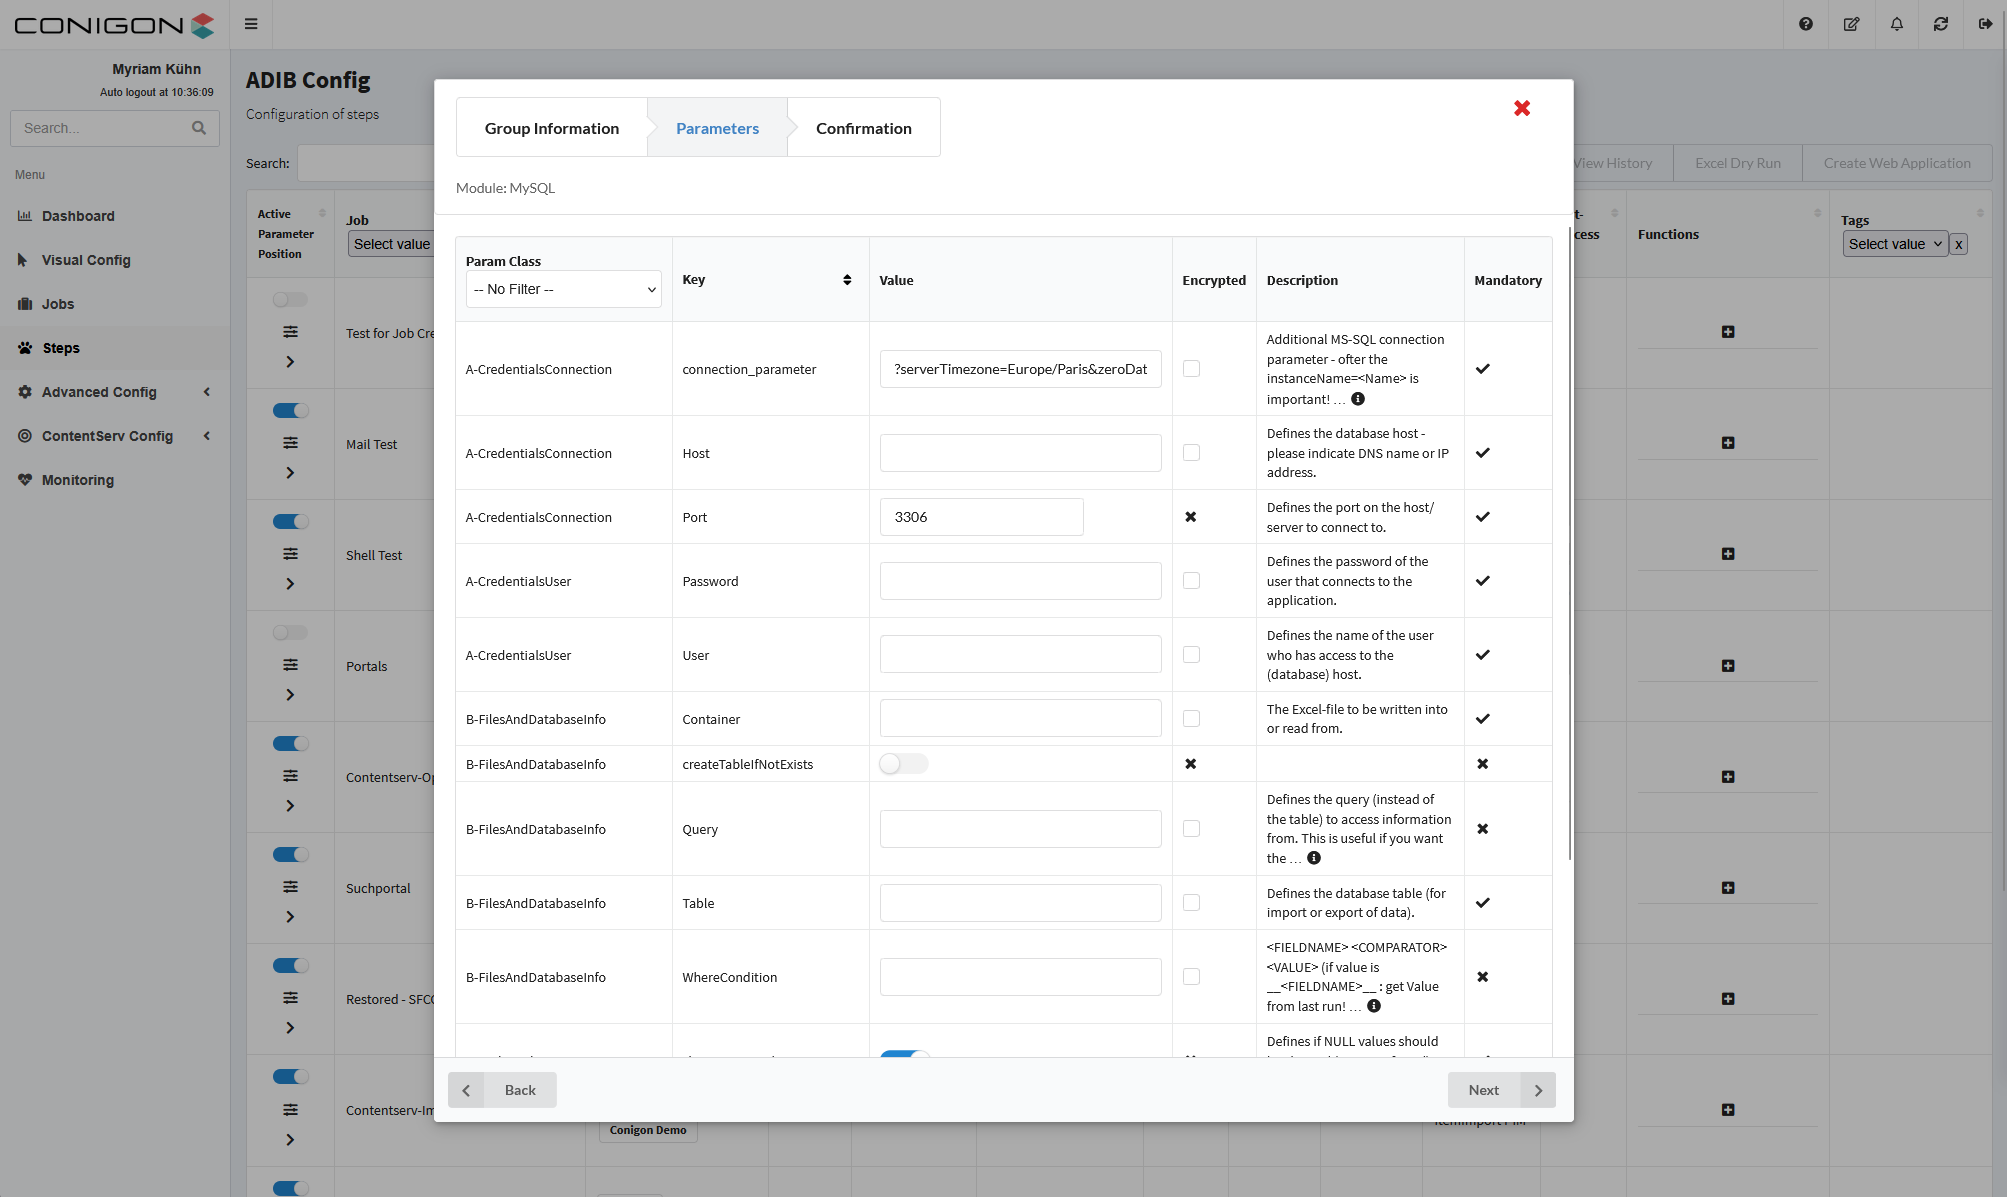
- Press next, verify the configuration and save.
- In the 'Other Information' window use the following values and click on the 'Next' button.
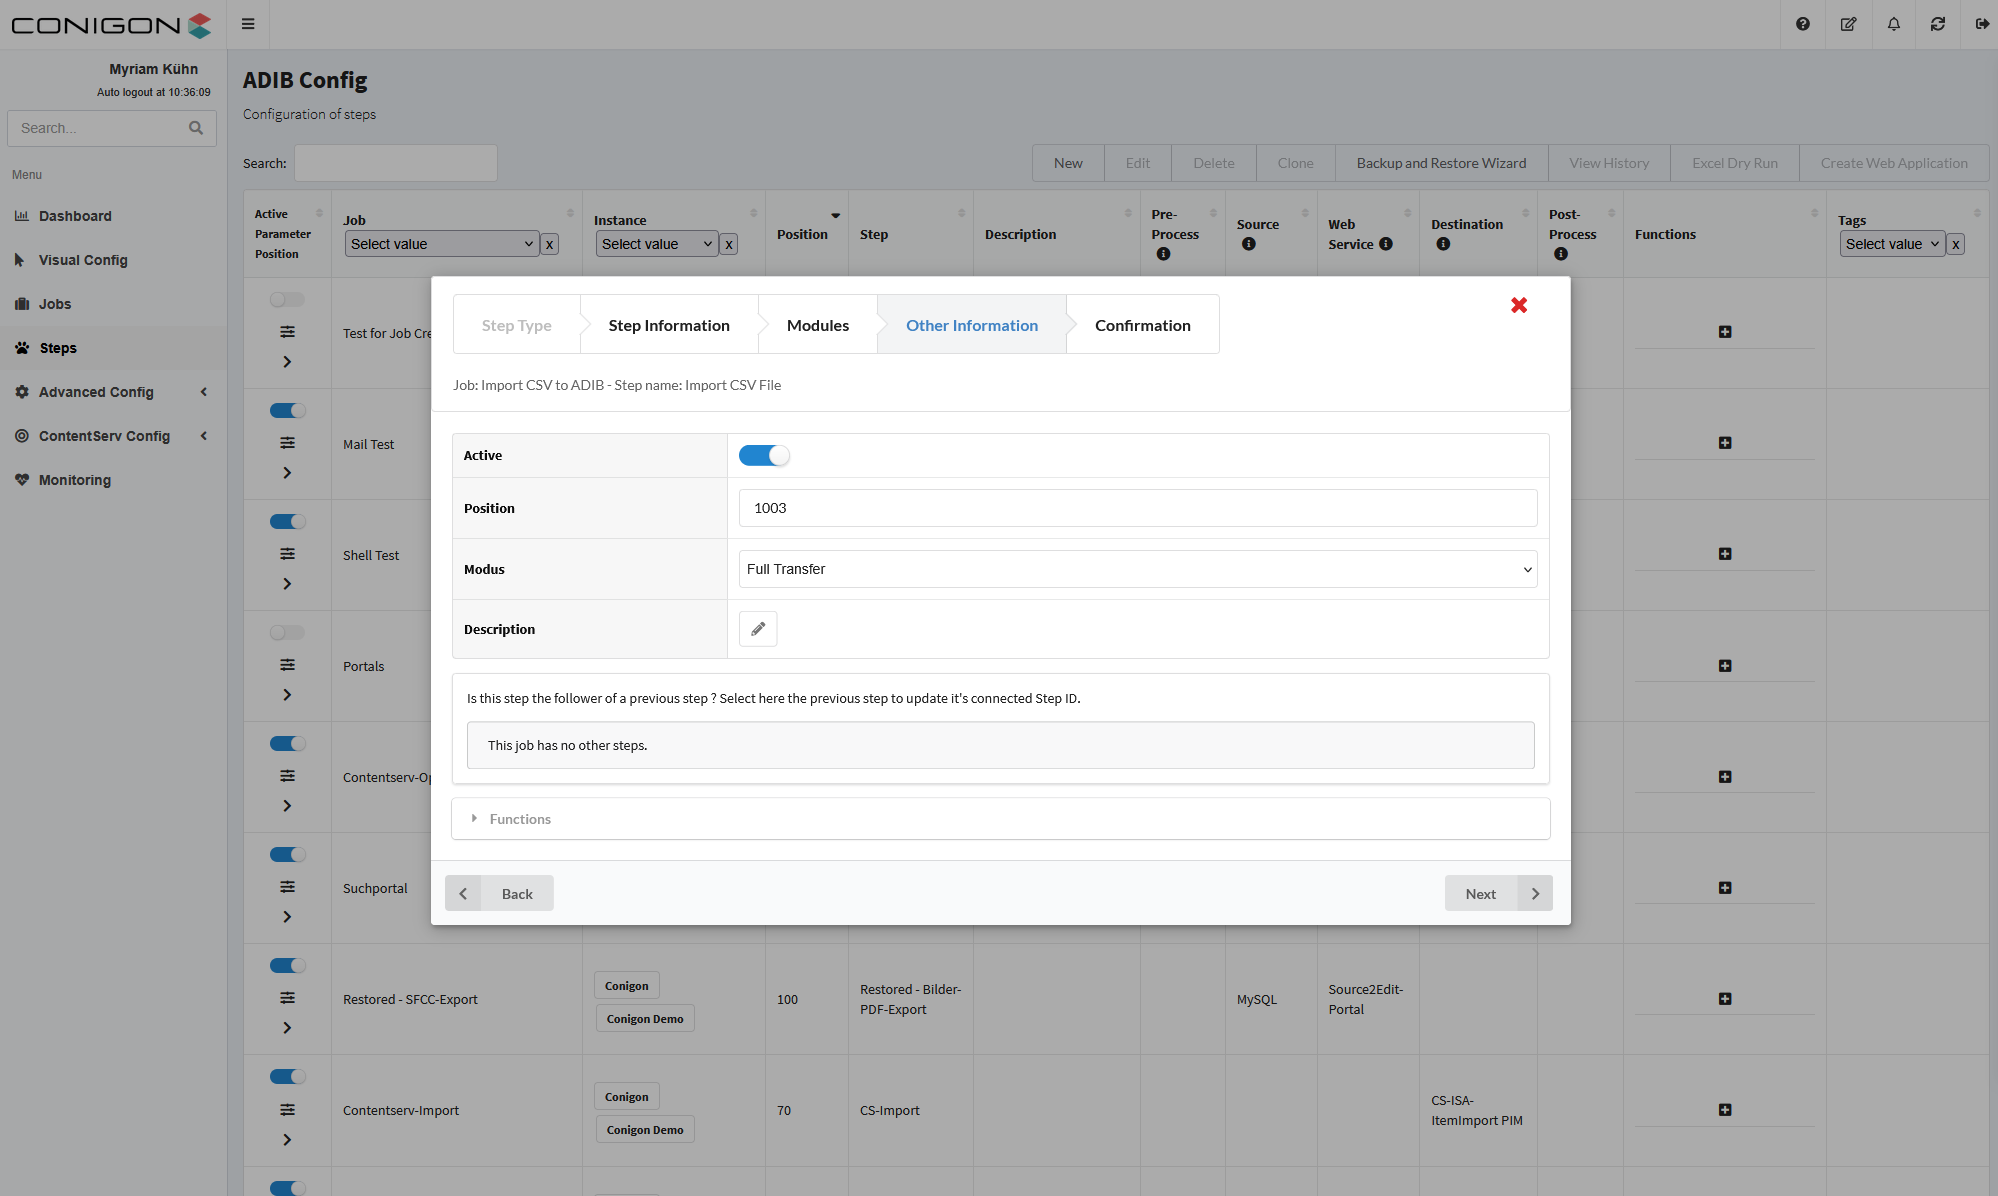
- Verify your configuration and save this step.
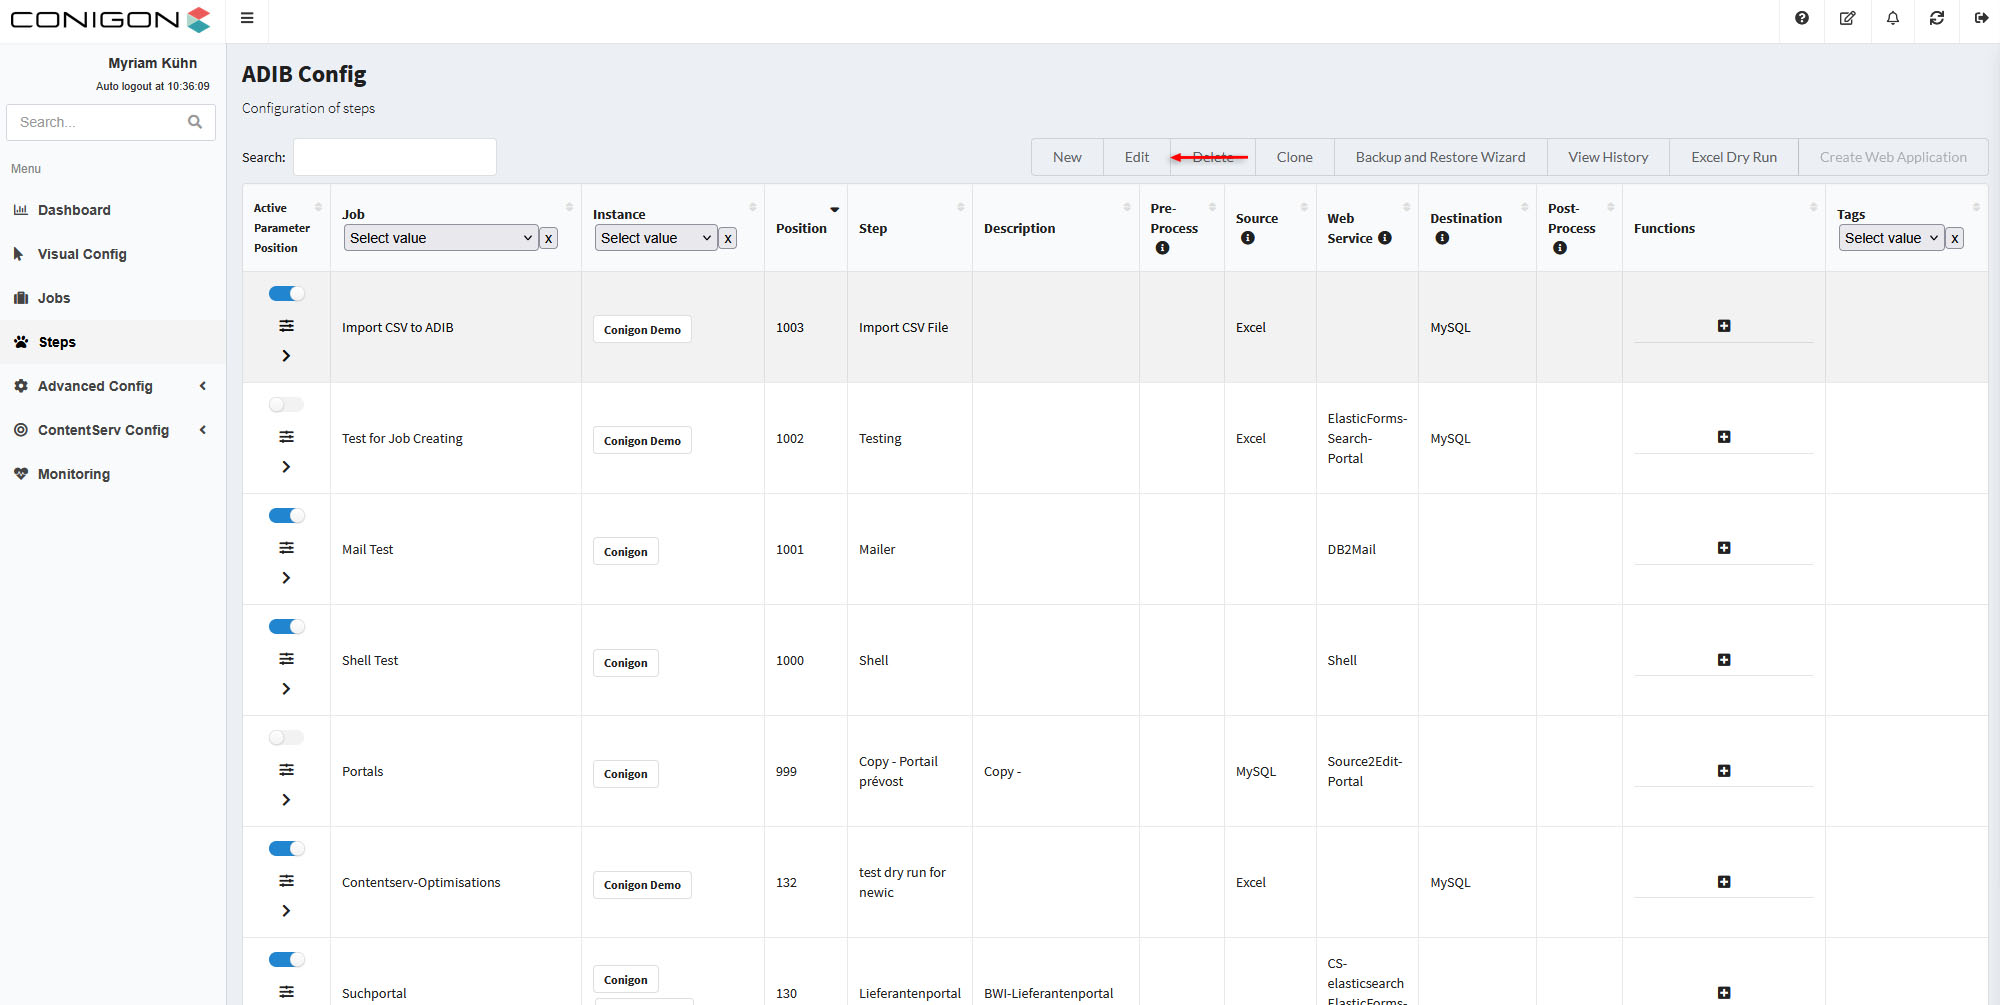
- If you need to edit the step after saving, you can select the step by clicking on the step in the table and press 'Edit' located at the top of the screen.
- When you are done with the step.
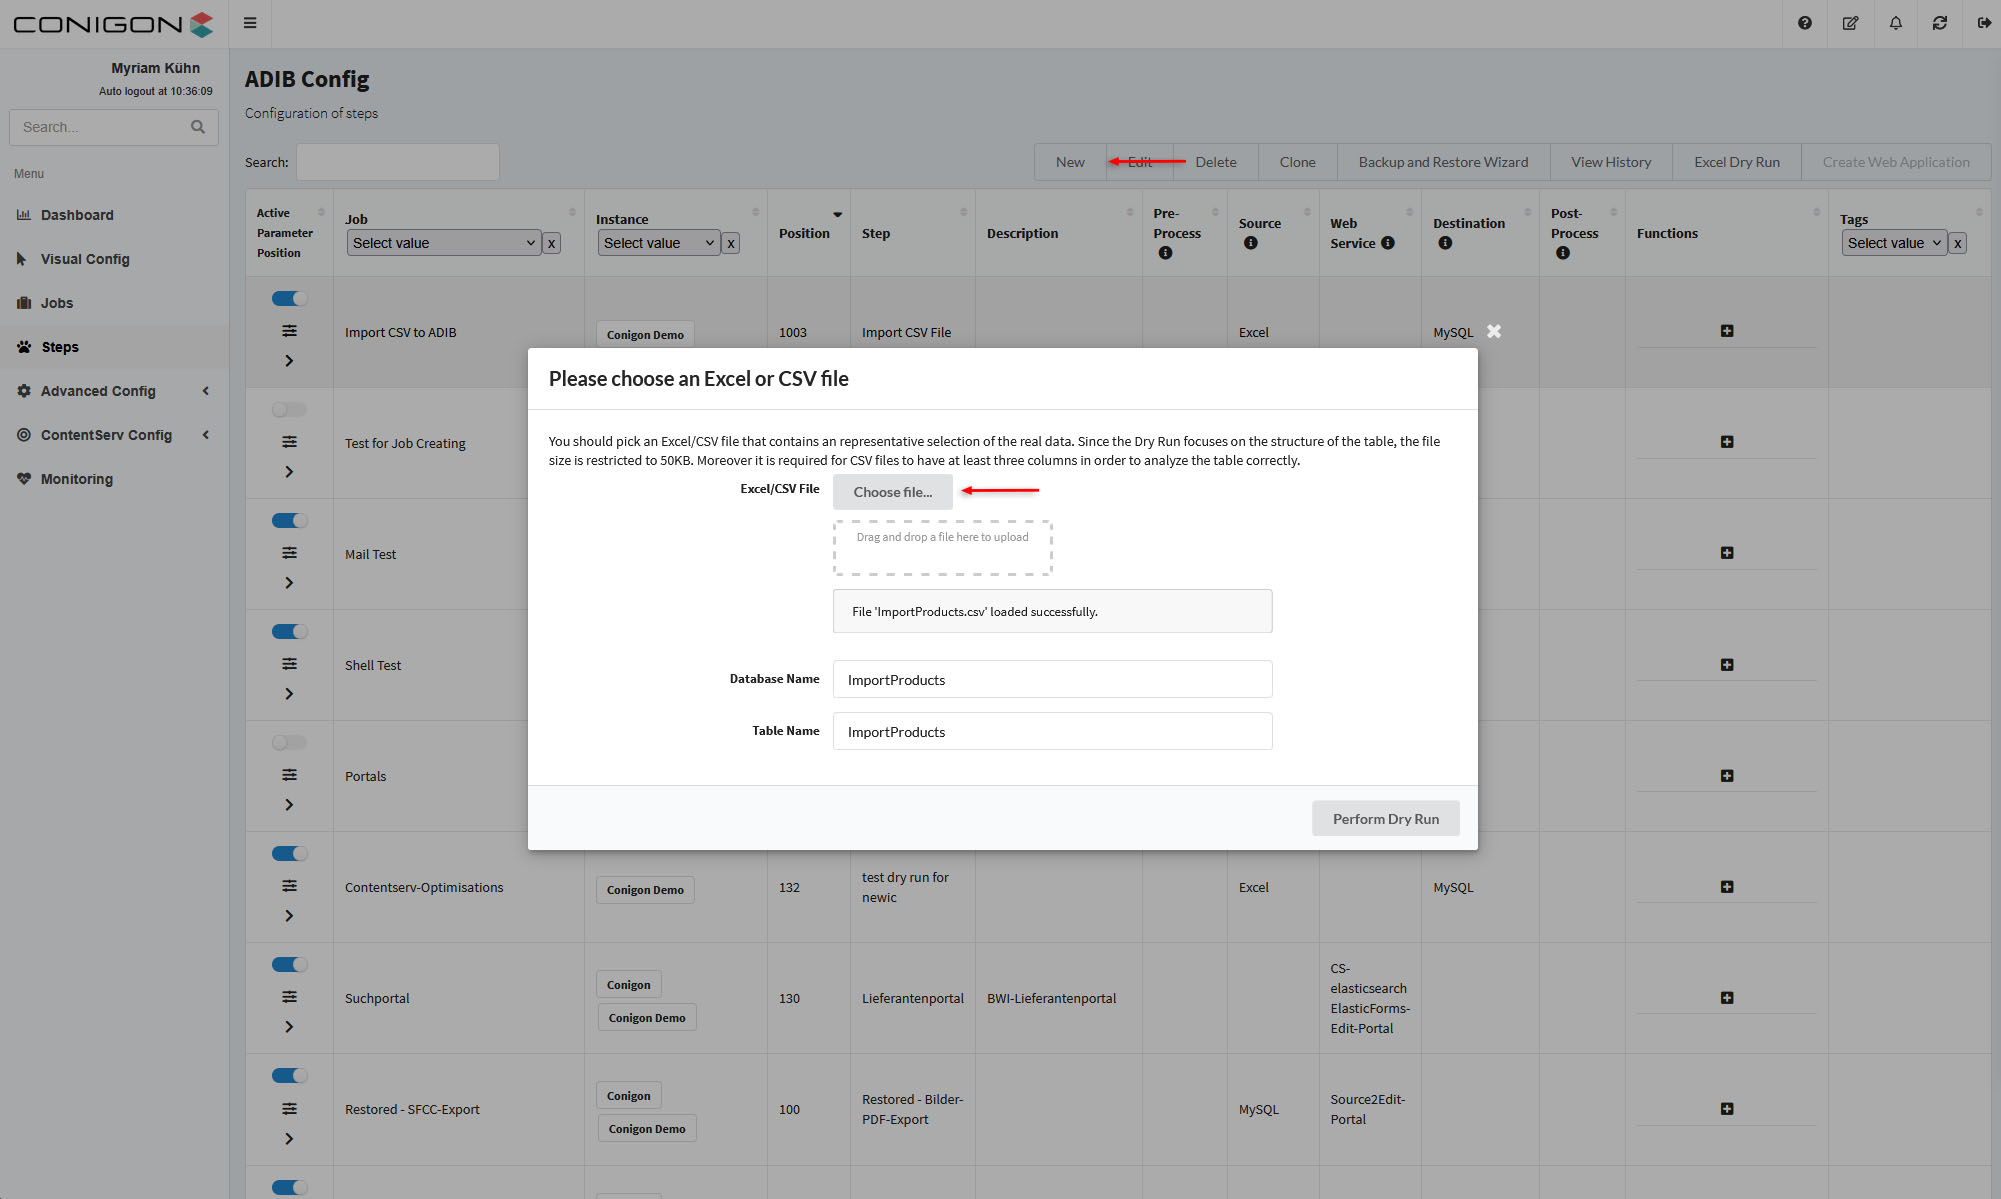
- Select your step by clicking on it in the table and then press 'Excel Dry Run.'
- Upload your excel file, enter the "Database Name" and the "Table Name" in the fields and click on 'Perform dry run.'
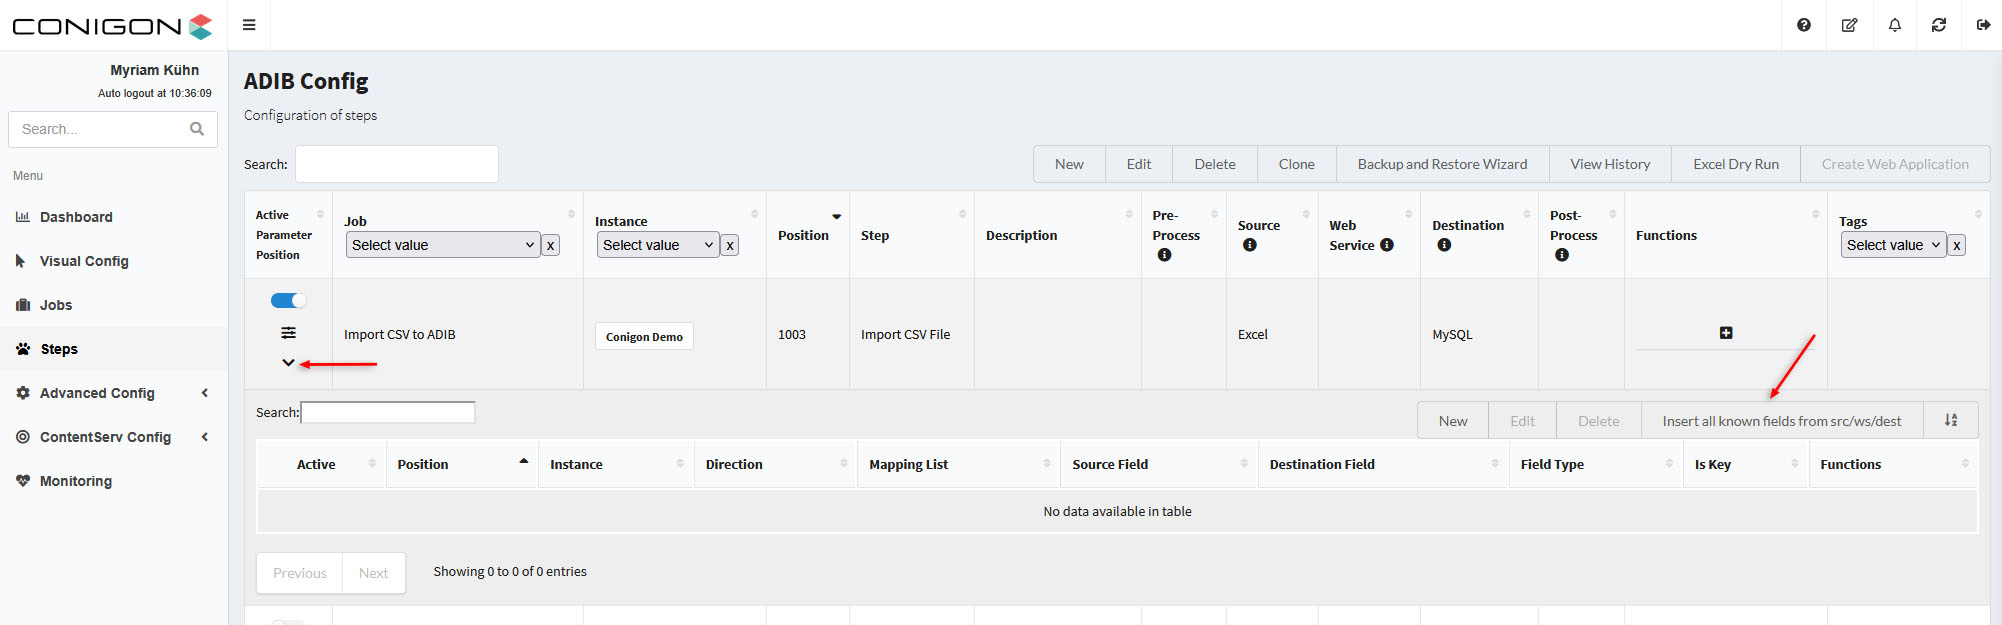
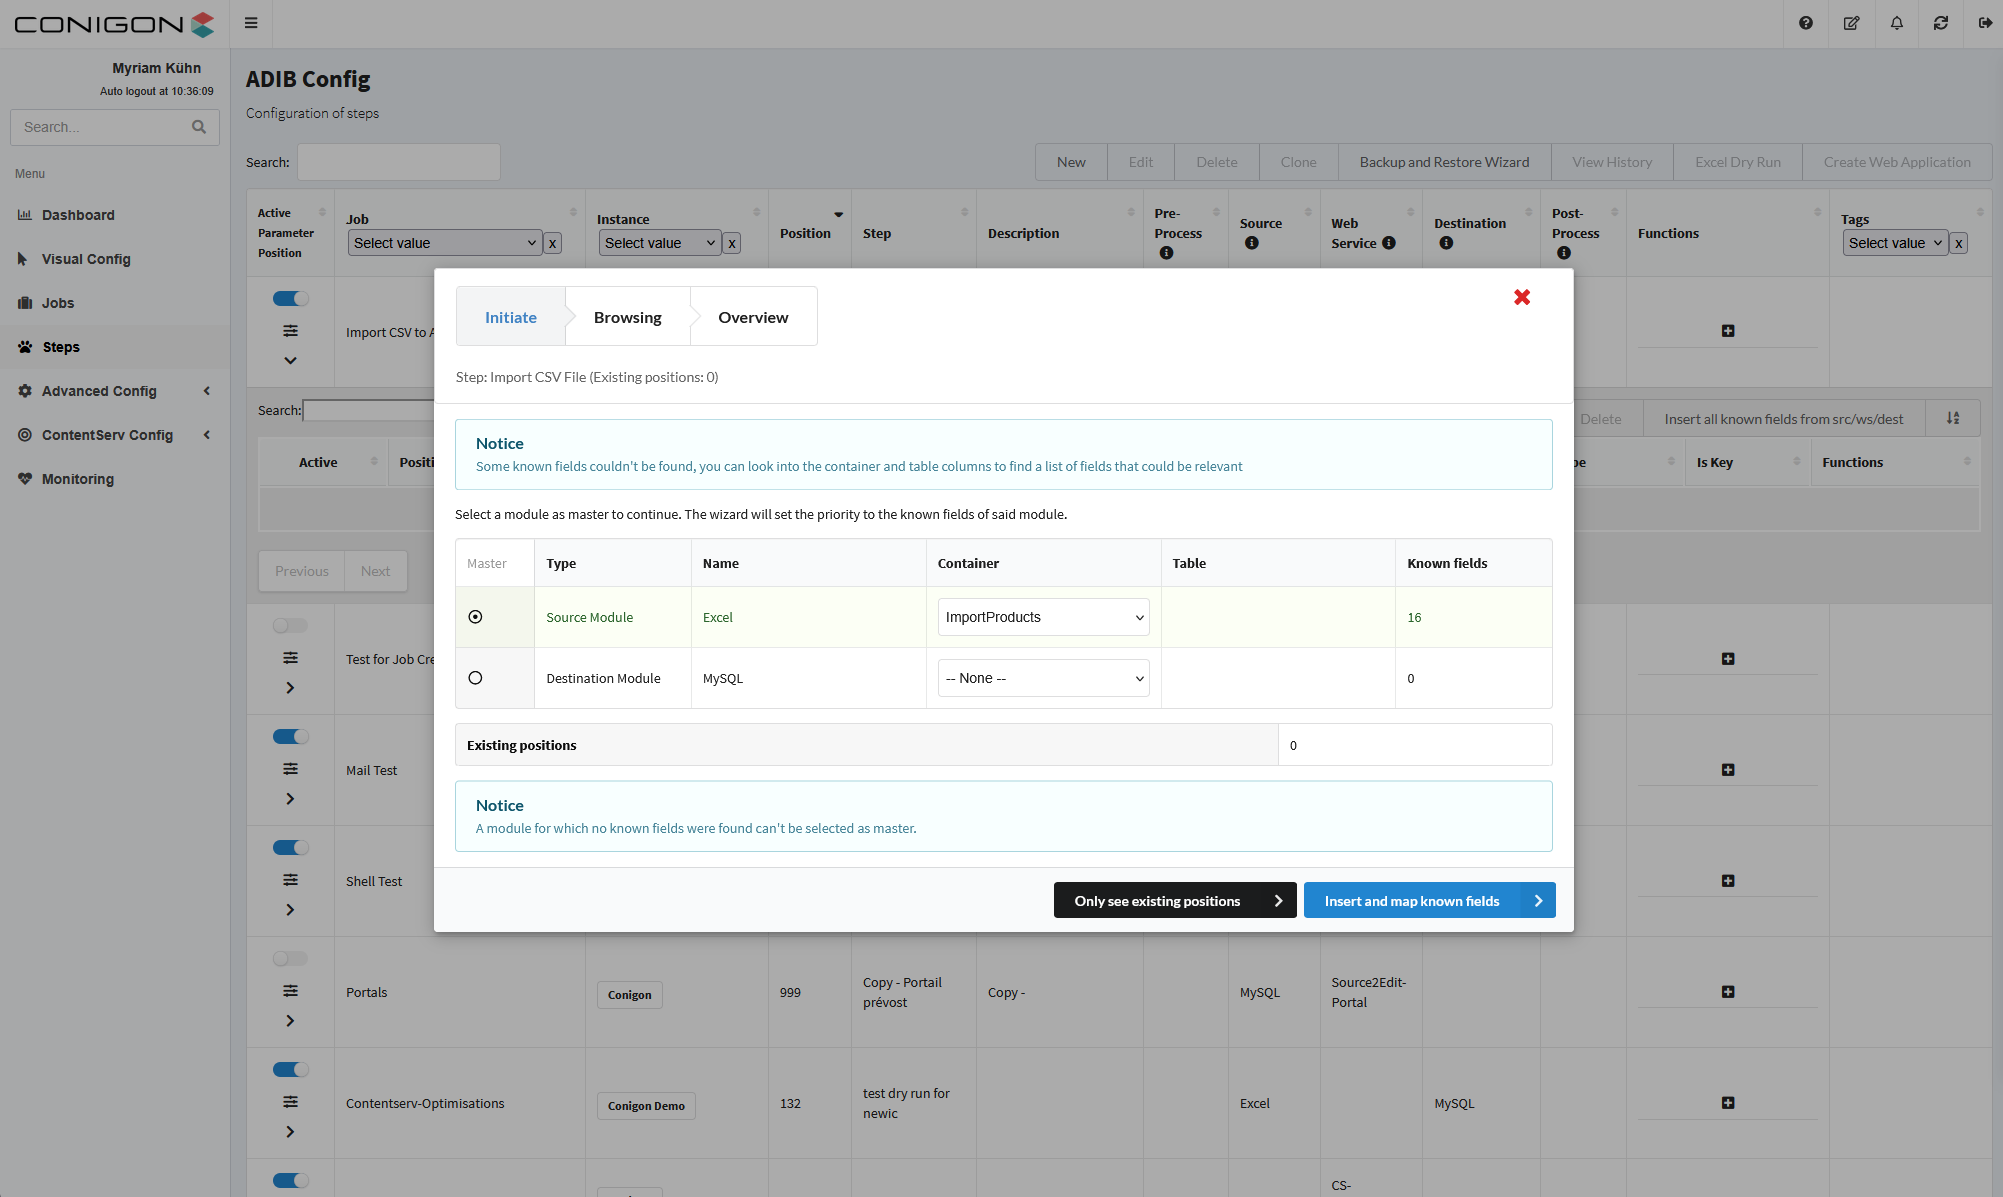
- Find your step and click on the small arrow and then click on 'Insert all known fields from src/ws/dest' to fill the step position.
- Then in the next window you will have to select the master module that is used to fill the columns.
- To do this select the container, then you can activate the module you want to choose for the master.
- Finally click on the button 'Insert and map known fields'.
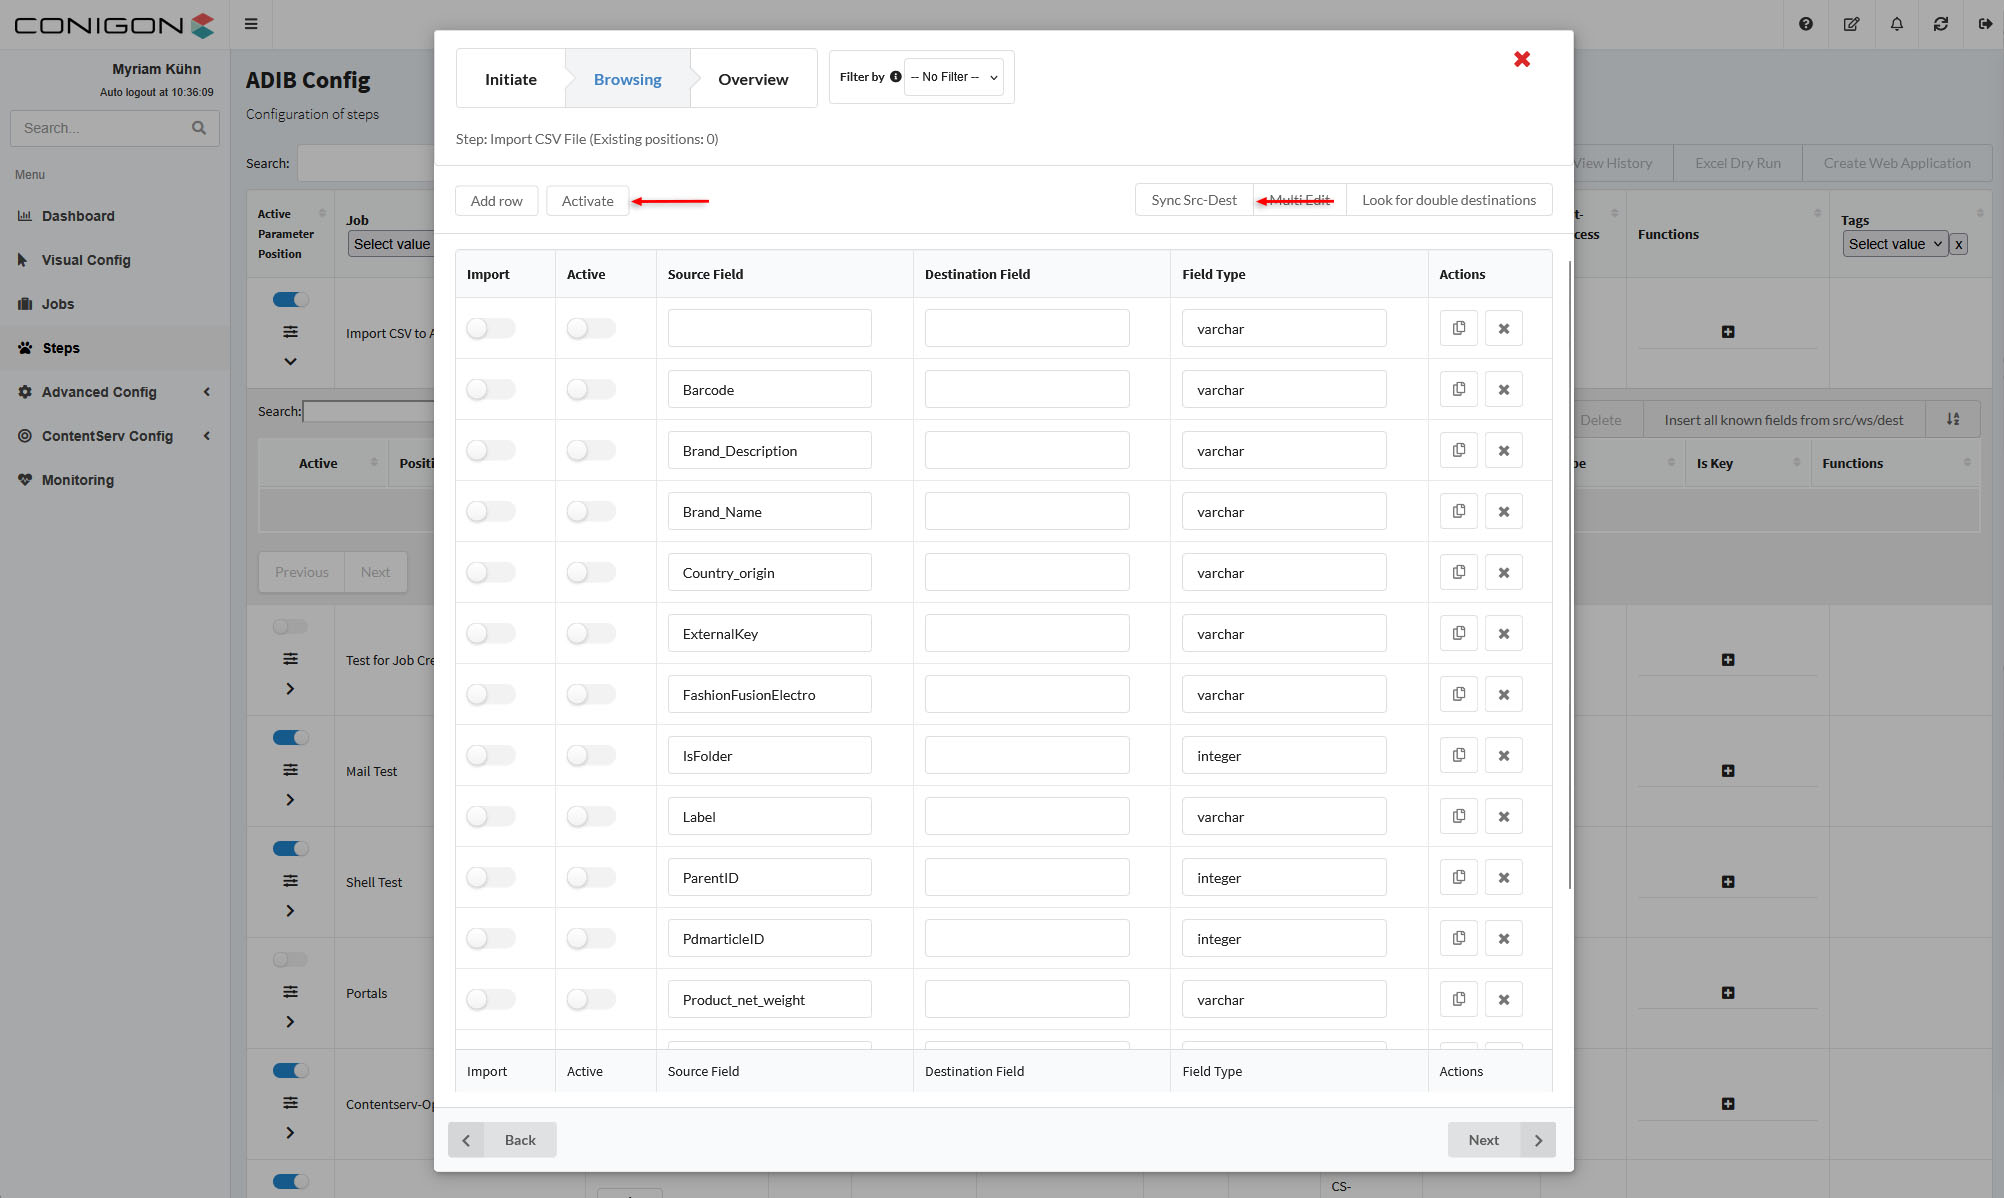
- You can now see the 'Source Field' and the 'Destination Field'.
- Click on the "Sync Src-Dest" button to fill the Destination Field and check if the information corresponds to your Database column names.
- You have to activate the rows you want to have or alternatively you can activate the whole rows by clicking on the 'Activate" button on the top. Click on "Next".
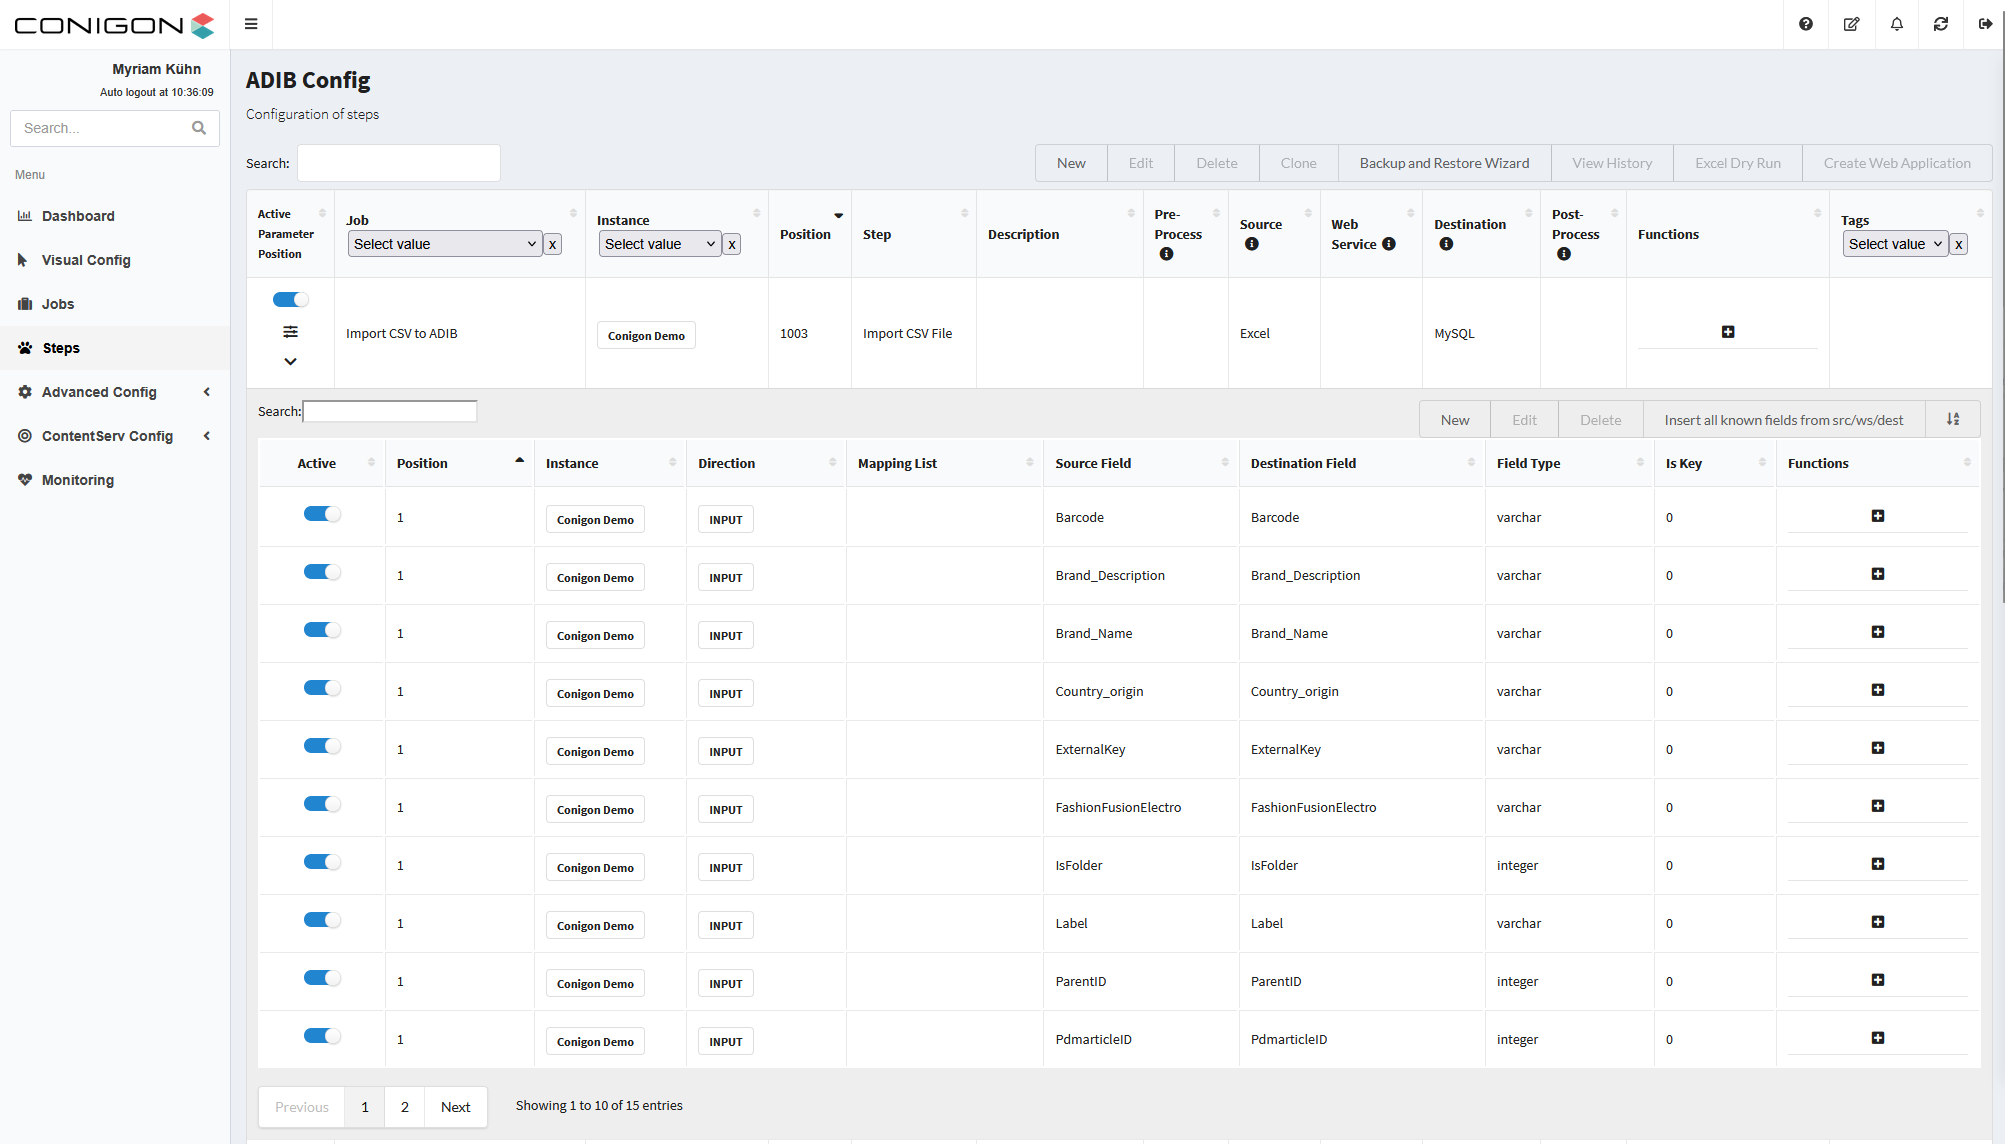
- Check the Overview and then click on 'Save'.
- You can now see the results in the table and do last adjustments.
- Once these configurations are completed, verified and correct, it is possible to run the job.