VIsual Config
VIsual Config
1. Purpose
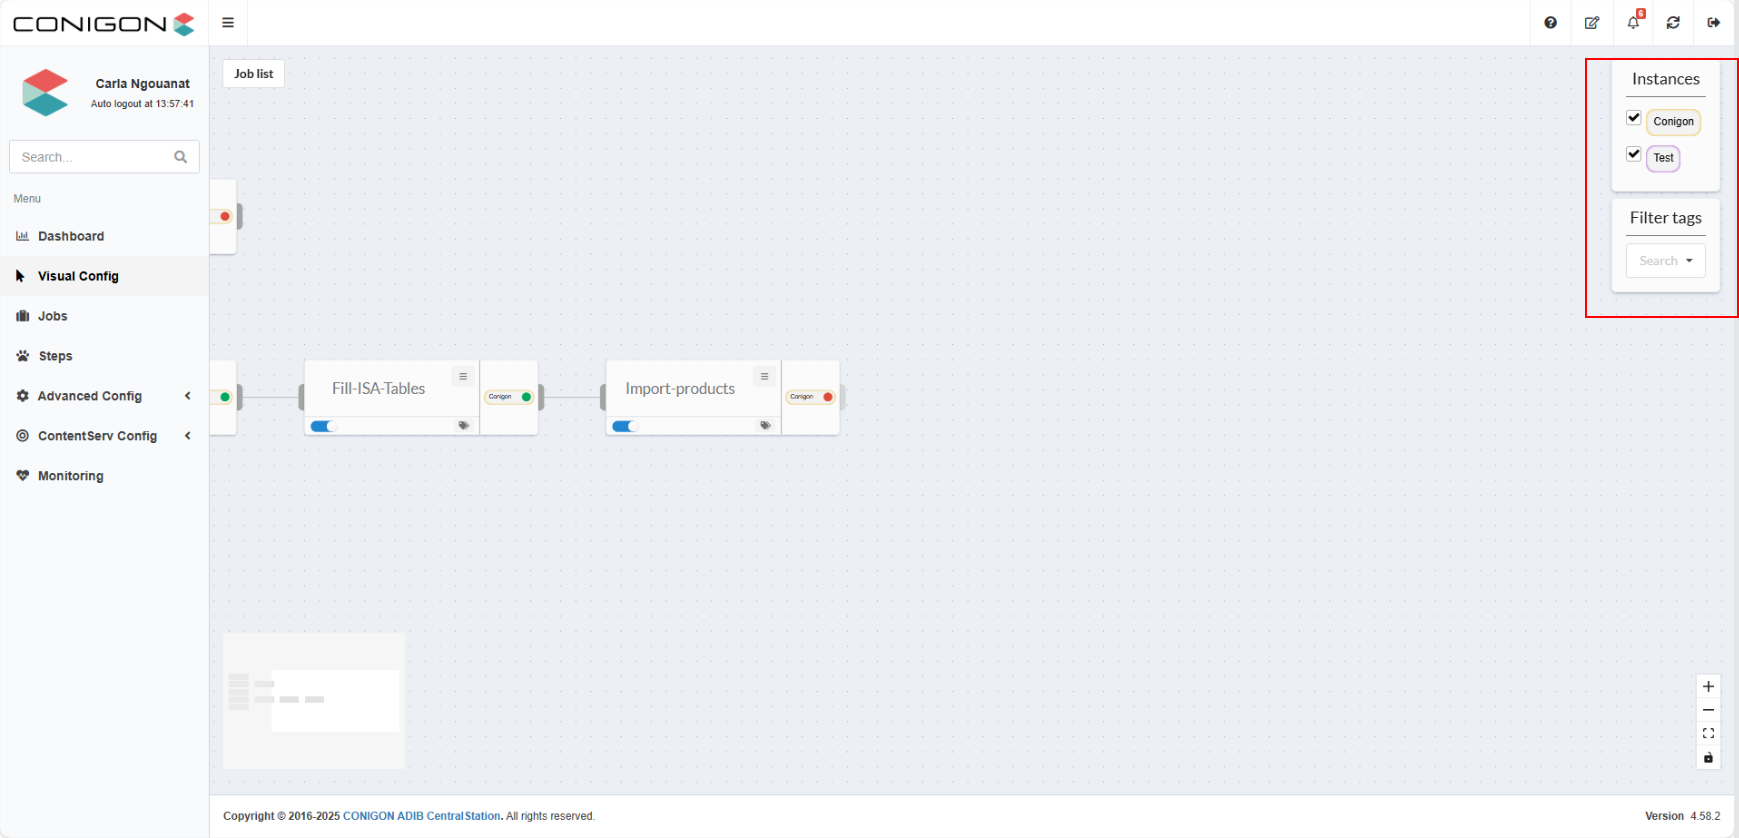
The Visual Config part of ADIB Centralstation allows users to create, edit, and visually manage Jobs and Steps. It provides a user-friendly graphical interface that clearly shows the structure of Jobs and Steps, and enables users to manage their creation, execution, and parameters.
Access is provided through the main menu of Adib Centralstation. Once opened, the user is presented with a graphical workspace where Jobs and Steps can be added, connected, modified, and executed.
2. Main Features
2.1 Actions on Jobs and Steps
Rule for Notification on Job
To configure the notification settings on a job from the Visual Config section :
- Right click on an empty area of the workspace.
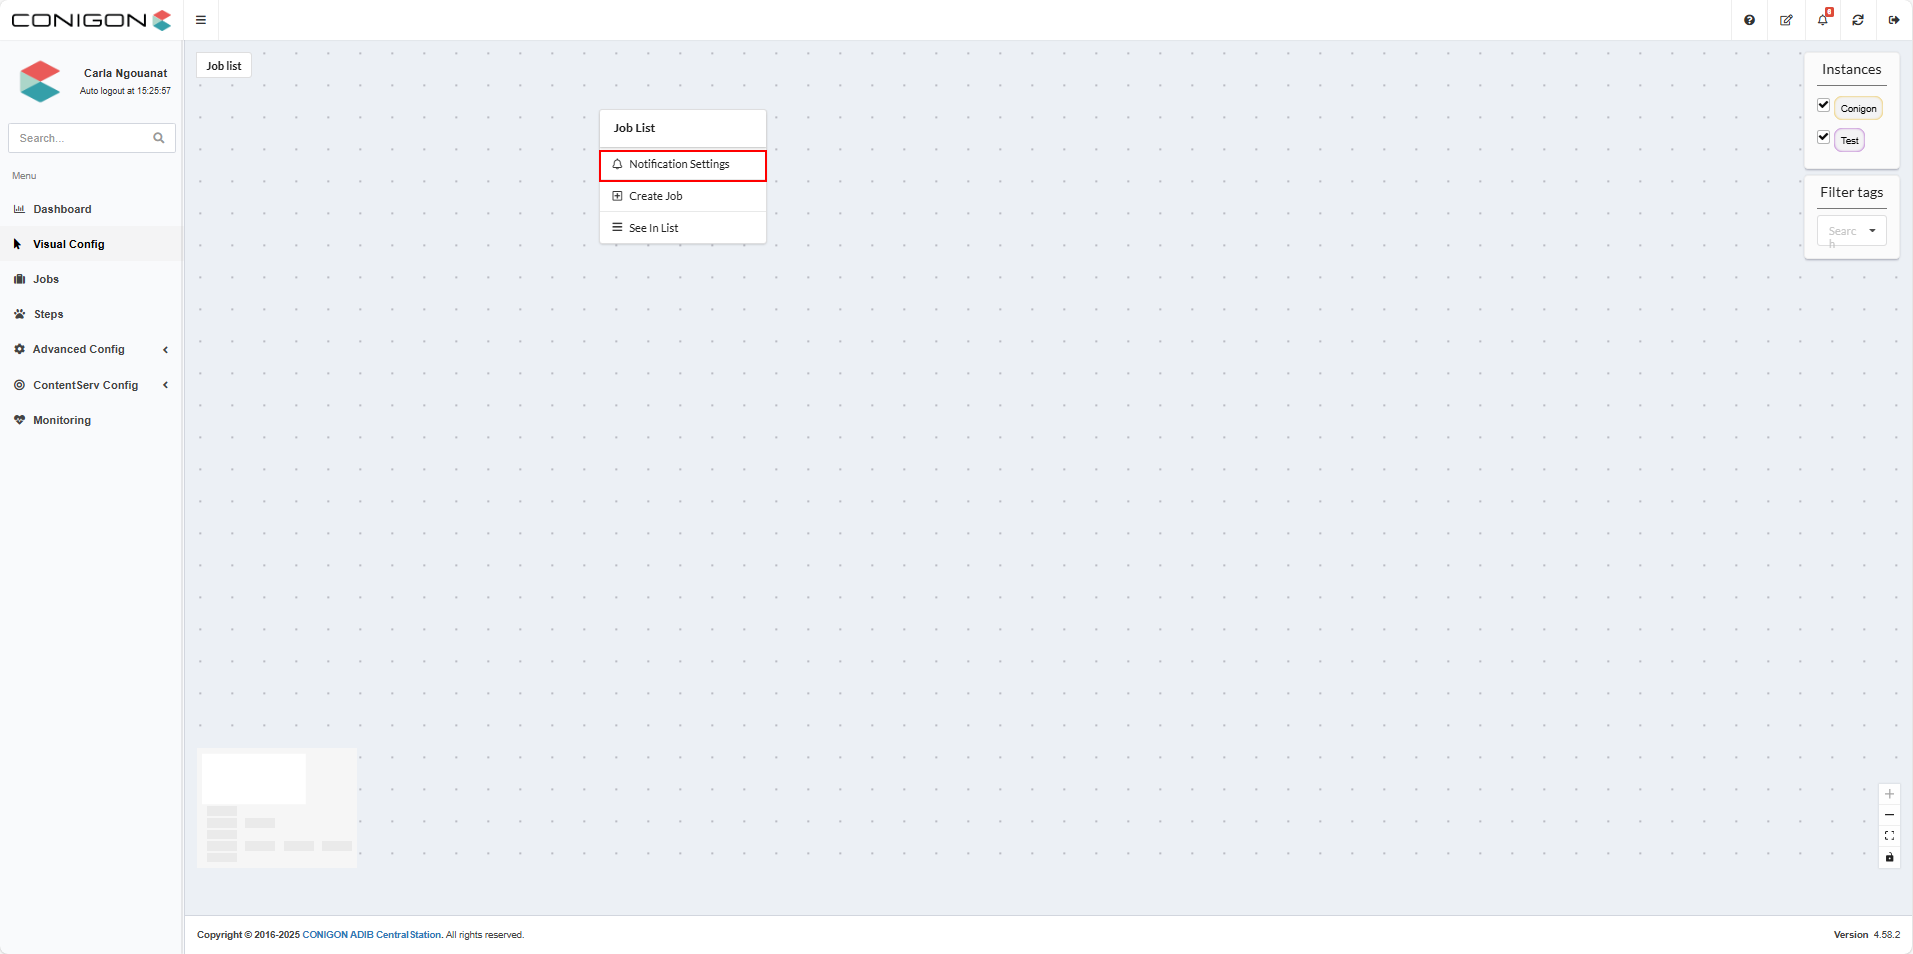
- Select "Notification Settings" and this will open the below pop up window with details of previously created rules.
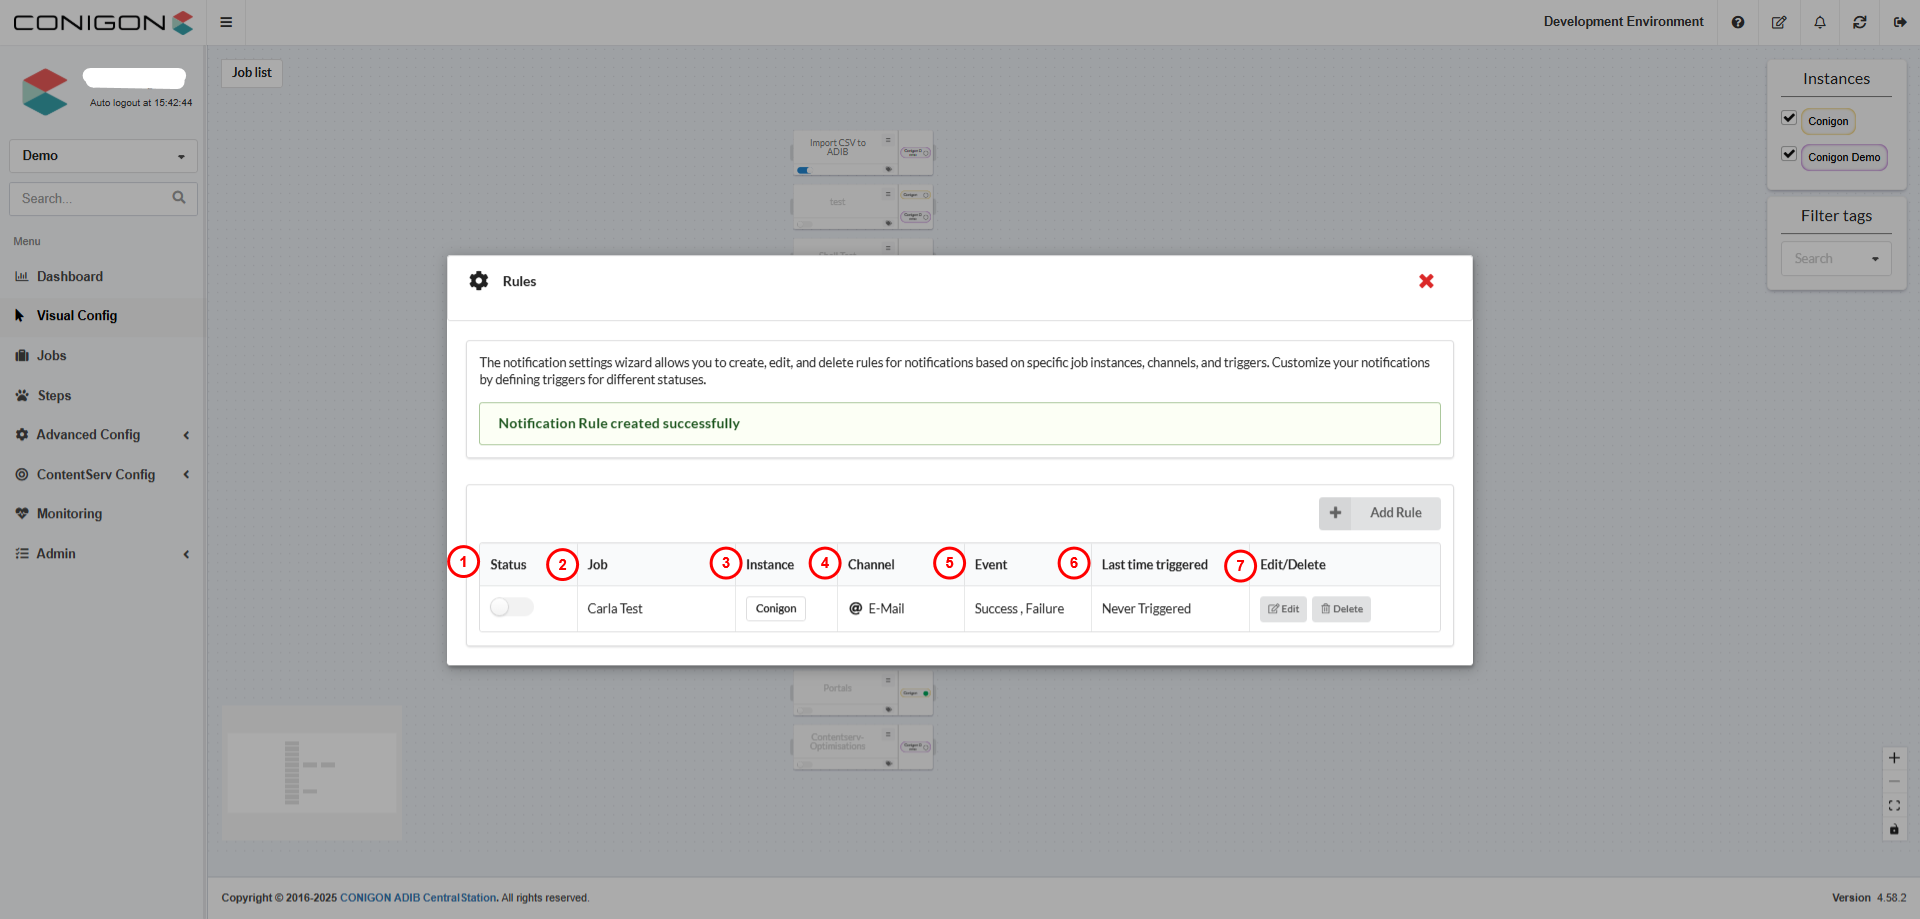
- Status : shows the status of the rule, if it is activated or deactivated.
- Job : shows the job(s) this rule is connected to.
- Instance : shows the instance this rule is connected to. Only one instance can be selected per a rule.
- Channel : shows the channel that this rule will be executed through.
- Event : shows the events that will trigger the notification.
- Last Time Triggered : shows the last time this event triggered a notification.
-
Edit / Delete : allows you to edit or delete a rule.
-
If you want to create a new rule select "Add Rule".
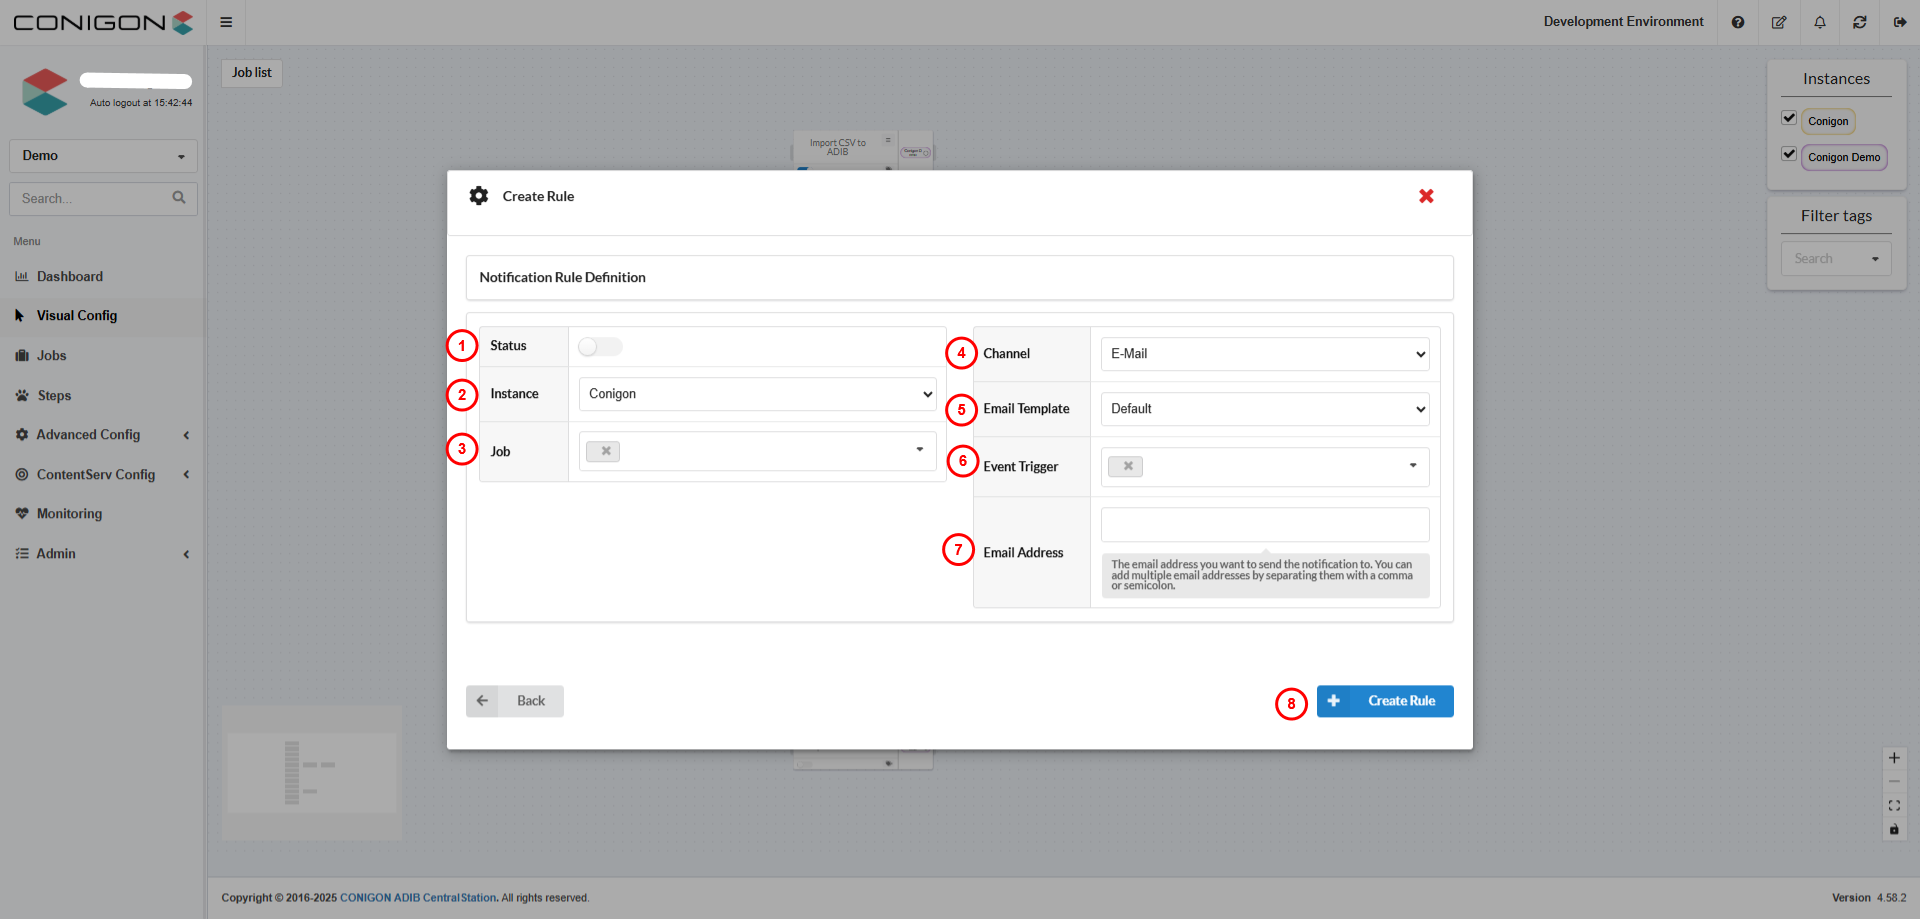
-
Status: toggle this button to activate or deactivate a rule.
- Instance : select the instance for this rule.
- Job:select the job for this rule. It is possible to select several jobs.
- Channel : select channel you wish to be notified by.
- Email Template: select the email template you wish to use for this notification. This option will only appear if "email" has been selected in the channel field.
- Event Trigger: select the event that will trigger this notification - success, in progress, failure, partial failure. Multiple events can be selected.
- Email Address: The email address you want to send the notification to. You can add multiple email addresses by separating them with a comma or semicolon. This option will only appear if "email" has been selected in the channel field.
- Create Rule: Saves your configuration and creates the rule.
2.2 Creating Jobs and Steps
Creating a Job
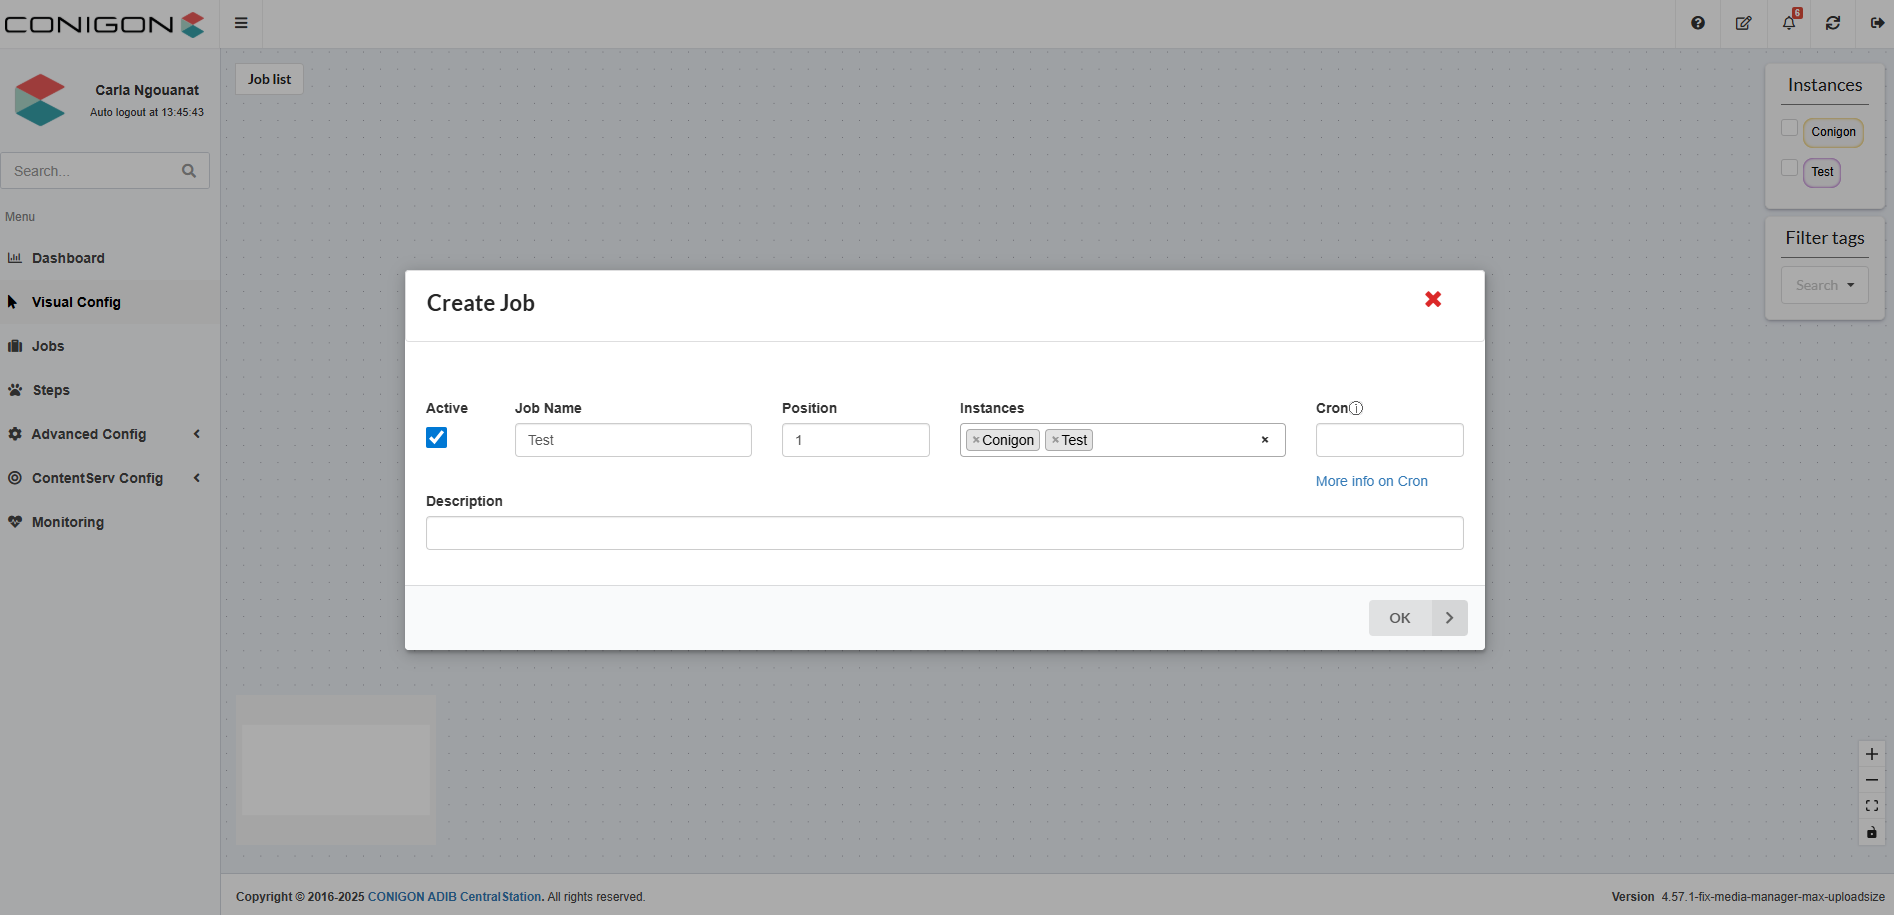
To create a job from the Visual Config section :
- Right-click on an empty area of the workspace.
- Select “Create Job”. By clicking on "See in List" below "Create Job" the user will be forwarded to the "Jobs" section of the application, where you can see all the jobs for the project.
- The Job will immediately appear in the graphical area.

- Save your changes by clicking 'OK' once you have entered all the required information.
Creating a Step
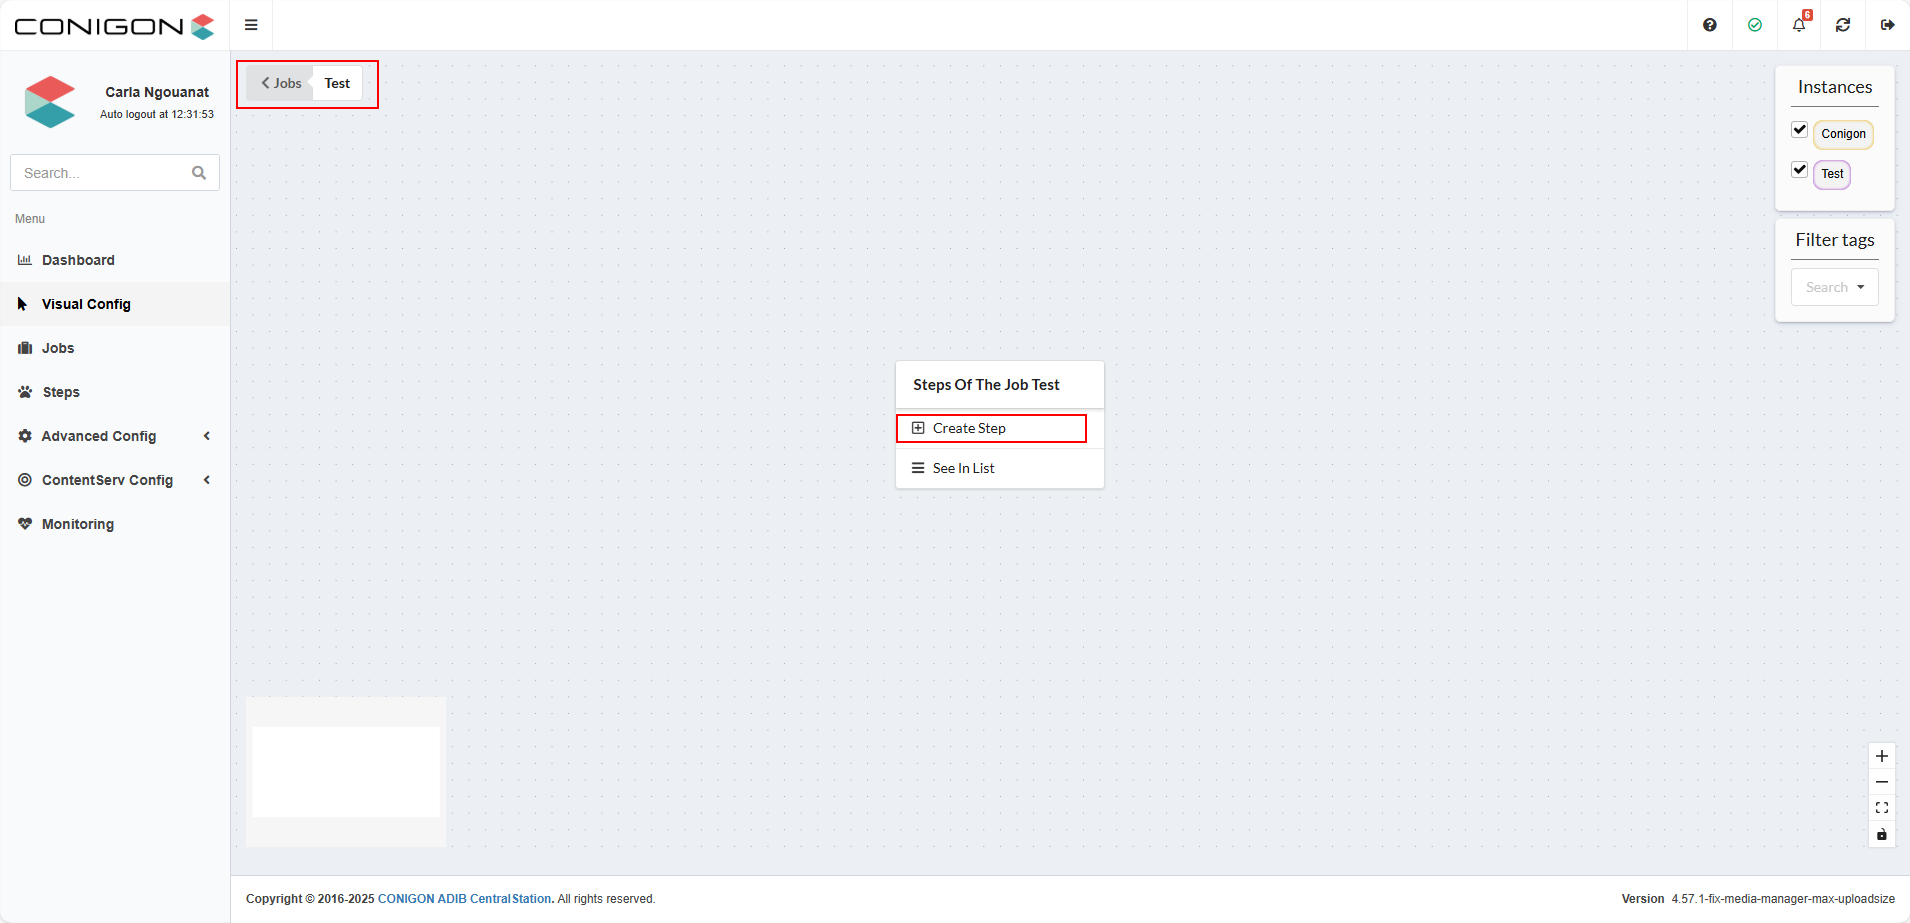
To create a step from the Visual Config section :
- Double-click on the job for which you want to create the step to open its list of steps. You will then be redirected to the list of steps in this job, as shown in the image below for the test job we created.
- Then to create a new step simply right-click on an empty area of the workspace and select “Create Step”. By clicking below on "See in List" the user will be forwarded to the Steps sections of the application related to this job.
3.2 Managing Jobs in Visual Config
Here is how a job is presented in Visual Config:
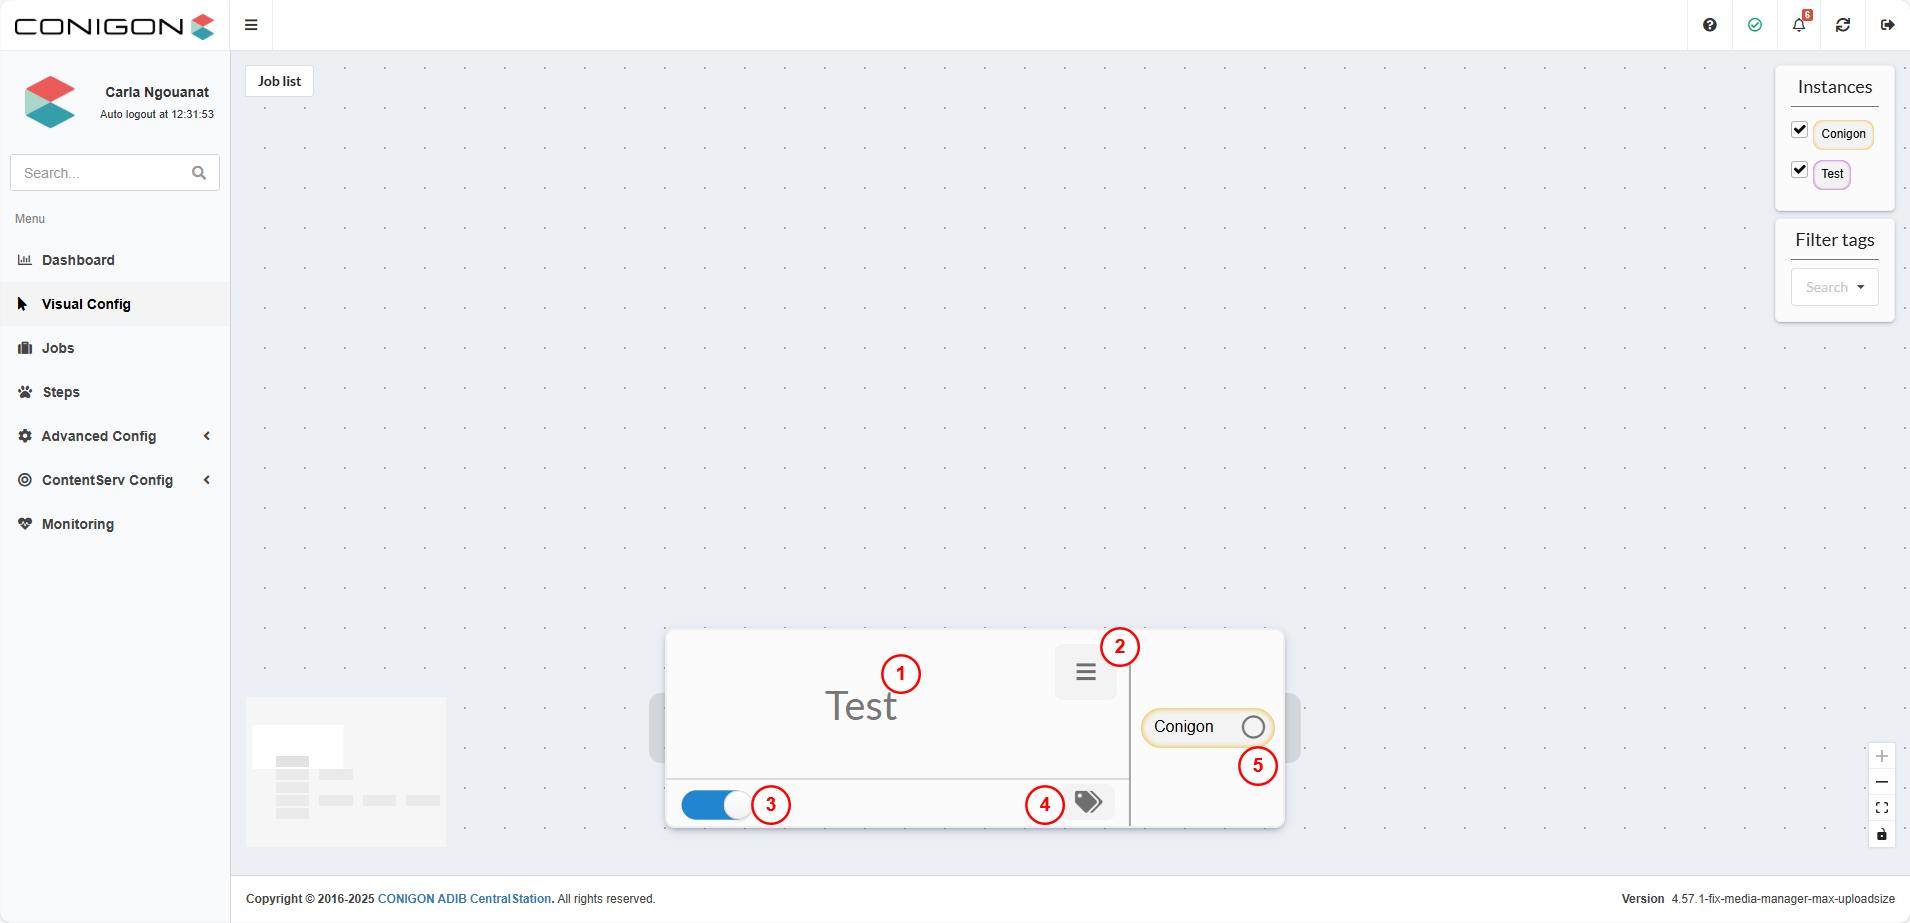
- The job name displays its ID when you hover over it (1).
- You can open a job’s context menu either by clicking the list icon or by right-clicking the job itself. The following actions are available from this menu (2):
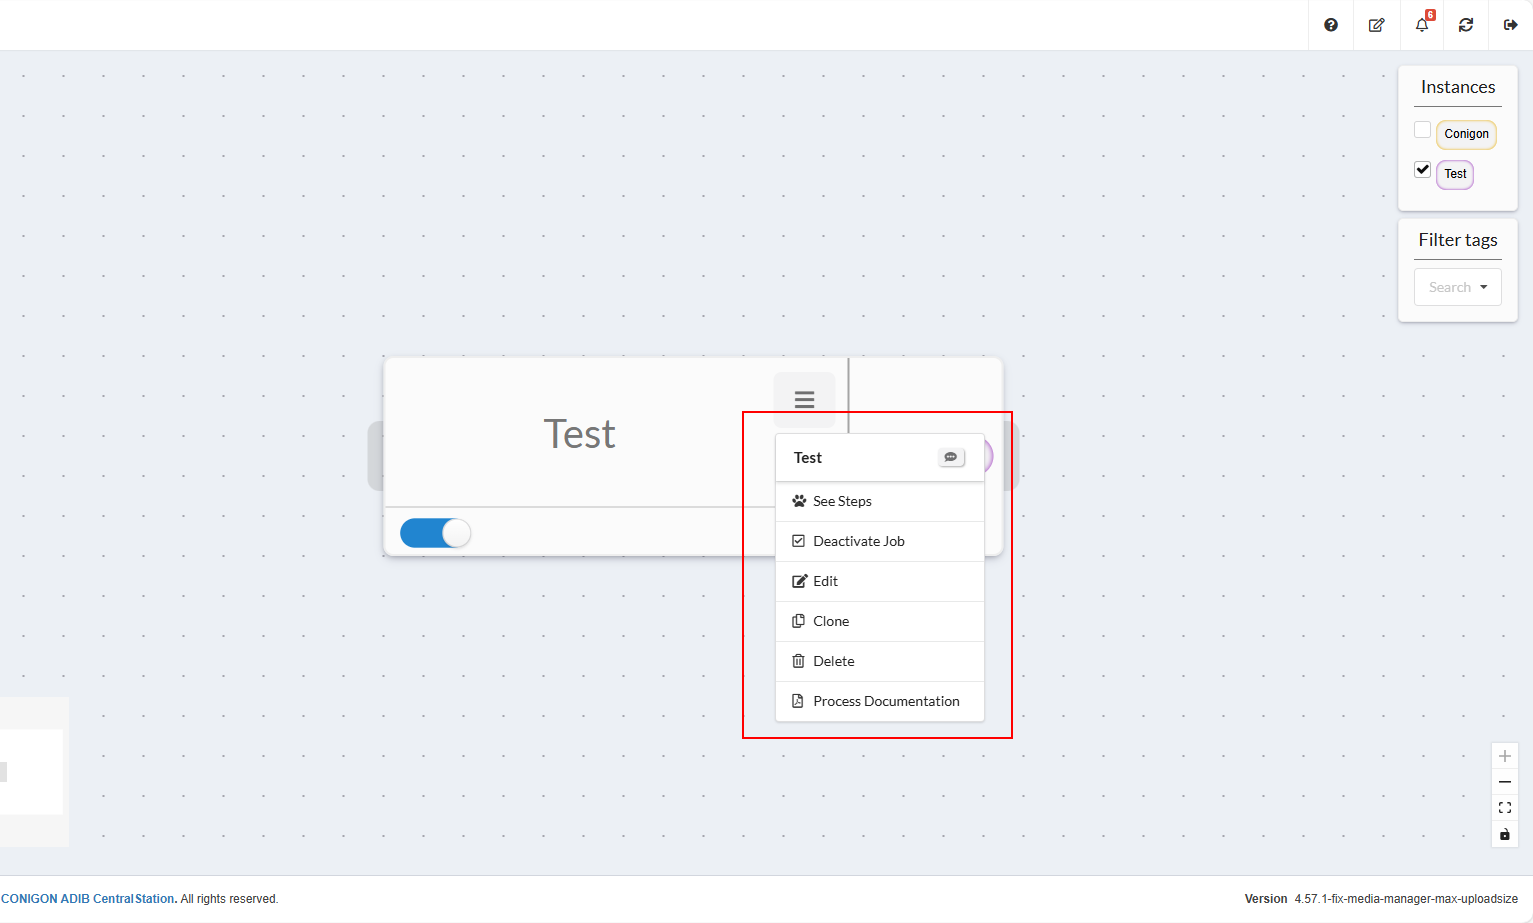
- Add a description(small message icon next to the title): Add or update the job’s description.
- See Steps: View the list of steps in the job.
- Deactivate the job: Prevents the job from being executed.
- Edit: Allows changes to the job’s name, description, or position.
- Clone: Duplicates the job. For example, cloning the job Test will create a new job named Copy of Test.
- Delete: Permanently deletes the job, including from the Jobs section.
- Process Documentation: Automatically generates documentation for this job.
- The blue button (3) is used to activate or deactivate the Job. A deactivated Job cannot be executed, even if an execution frequency is defined.
- The button (4) represents tags. You can add or select a tag, which serves as a search filter.
- The instance button (5) shows a menu that provides the following actions:
- Access to Monitoring to check Job execution results
- The Directstart option to run the Job immediately
3.3 Managing Steps in Visual Config
Here is how a step is presented in Visual Config: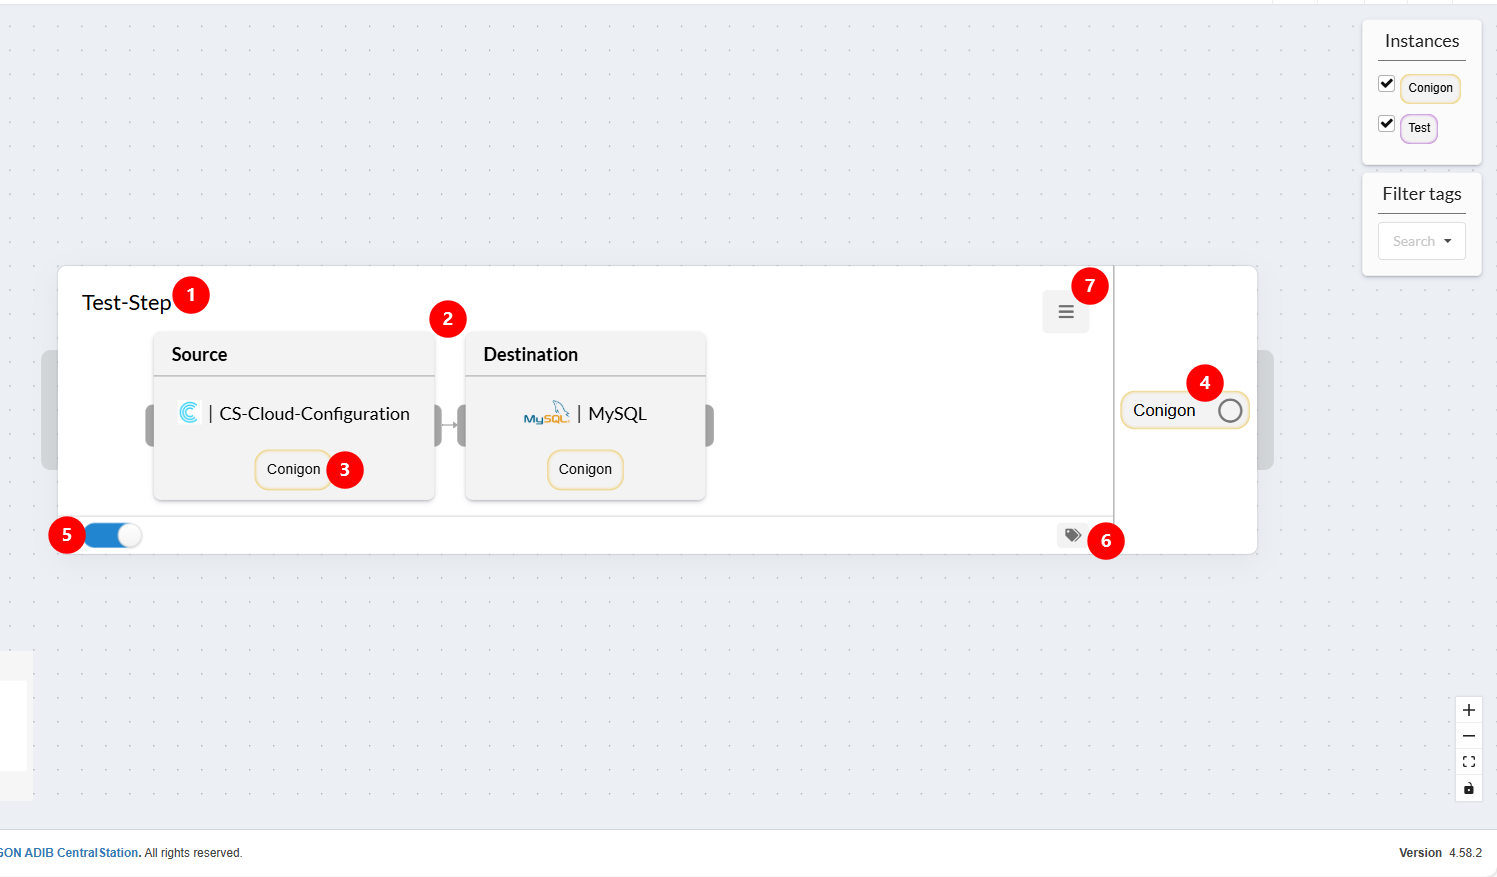
- The step name displays its ID when you hover over it (1).
- Connections between source and destination are shown, including the type (Excel, MySQL, etc.) (2).
- Clicking the instance name of a module (source, destination, or web service) opens the module settings for editing (3).
- You can open a step’s context menu by clicking the instance name of the step (4):
- See Monitoring: View the step’s execution results.
- Dry Run
- Create Web Application: Generate a web application from this step.
- The blue button (5) is used to activate or deactivate the step. Even if the job is active, a deactivated step will not be executed. Activation is also required for Dry Run and Web Application features.
- The button (6) represents tags. You can add or select a tag, which serves as a search filter.
- Right-clicking or using the menu on a step provides (7):
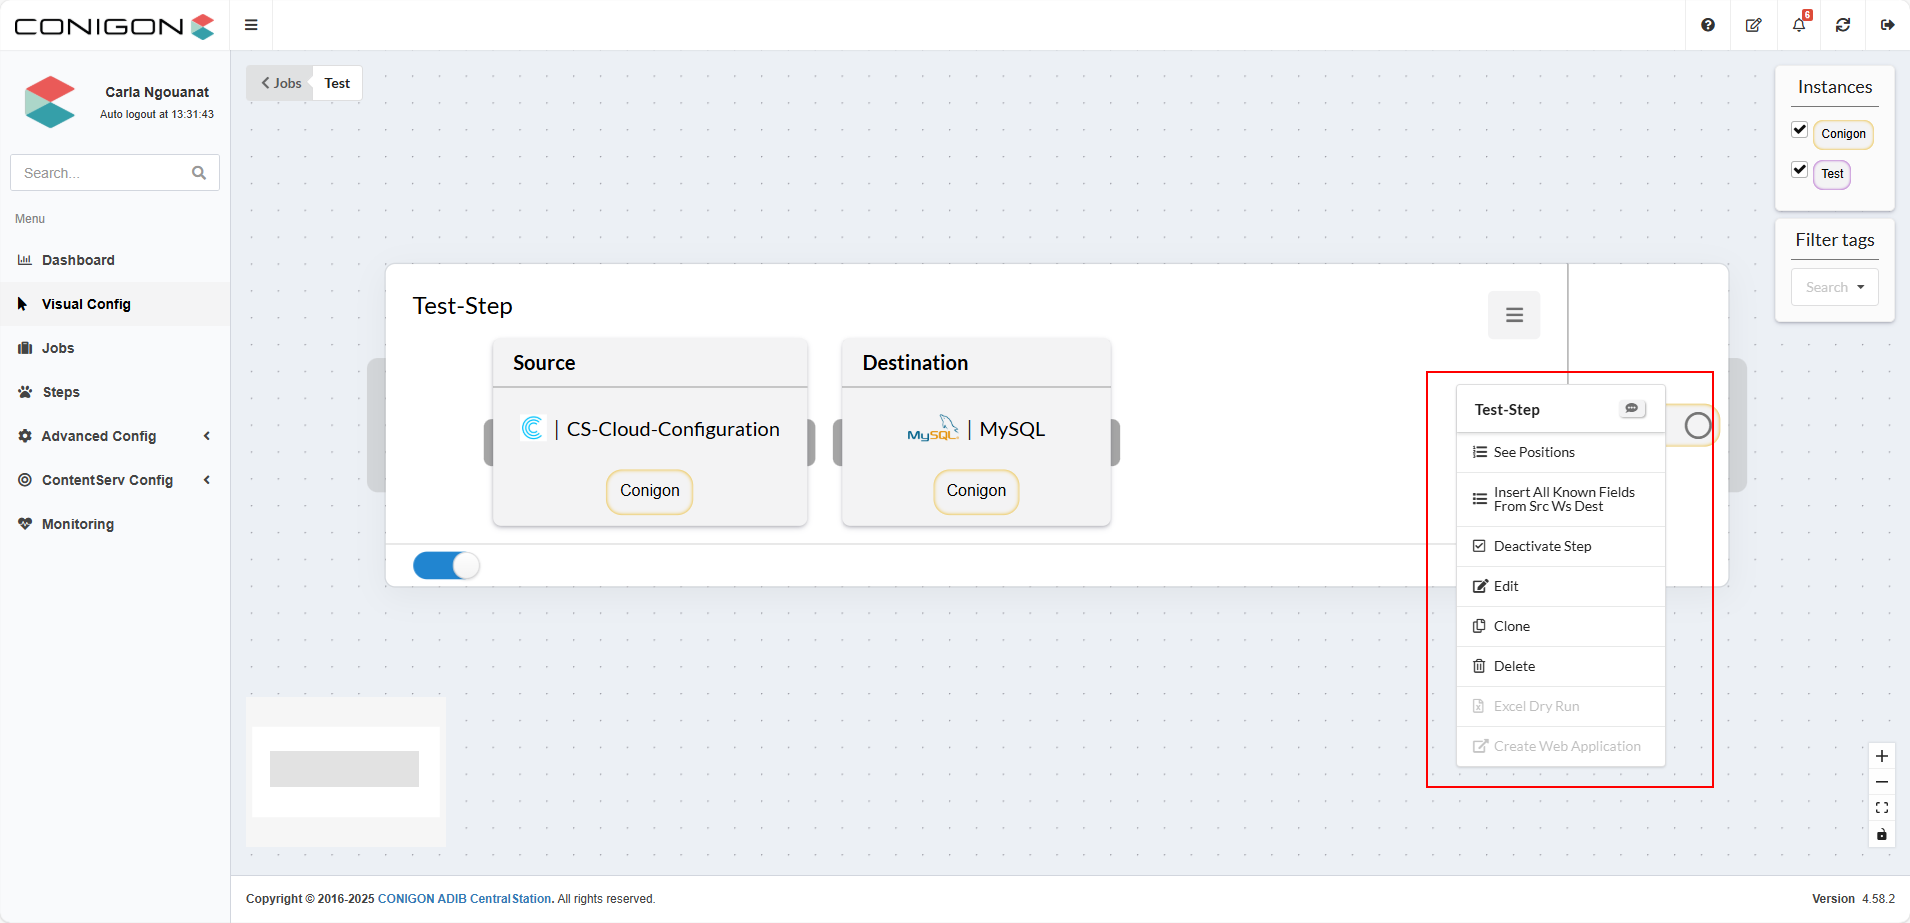
- Edit the step description: Add or update the step’s description.
- See Positions: View the step’s positions (see Jobs & Steps chapter).
- Insert all known fields from the source or destination
- Deactivate the step: Prevents the step from being executed.
- Edit: Allows changes to the step’s properties (name, instance, modules, position, etc.).
- Clone: Duplicates the step. For example, cloning the step Test will create a new step named Copy of Test.
- Delete: Permanently removes the step.
- Excel Dry Run
- Create Web Application: Generates a web application from this step.
3.4 General Actions in Visual Config
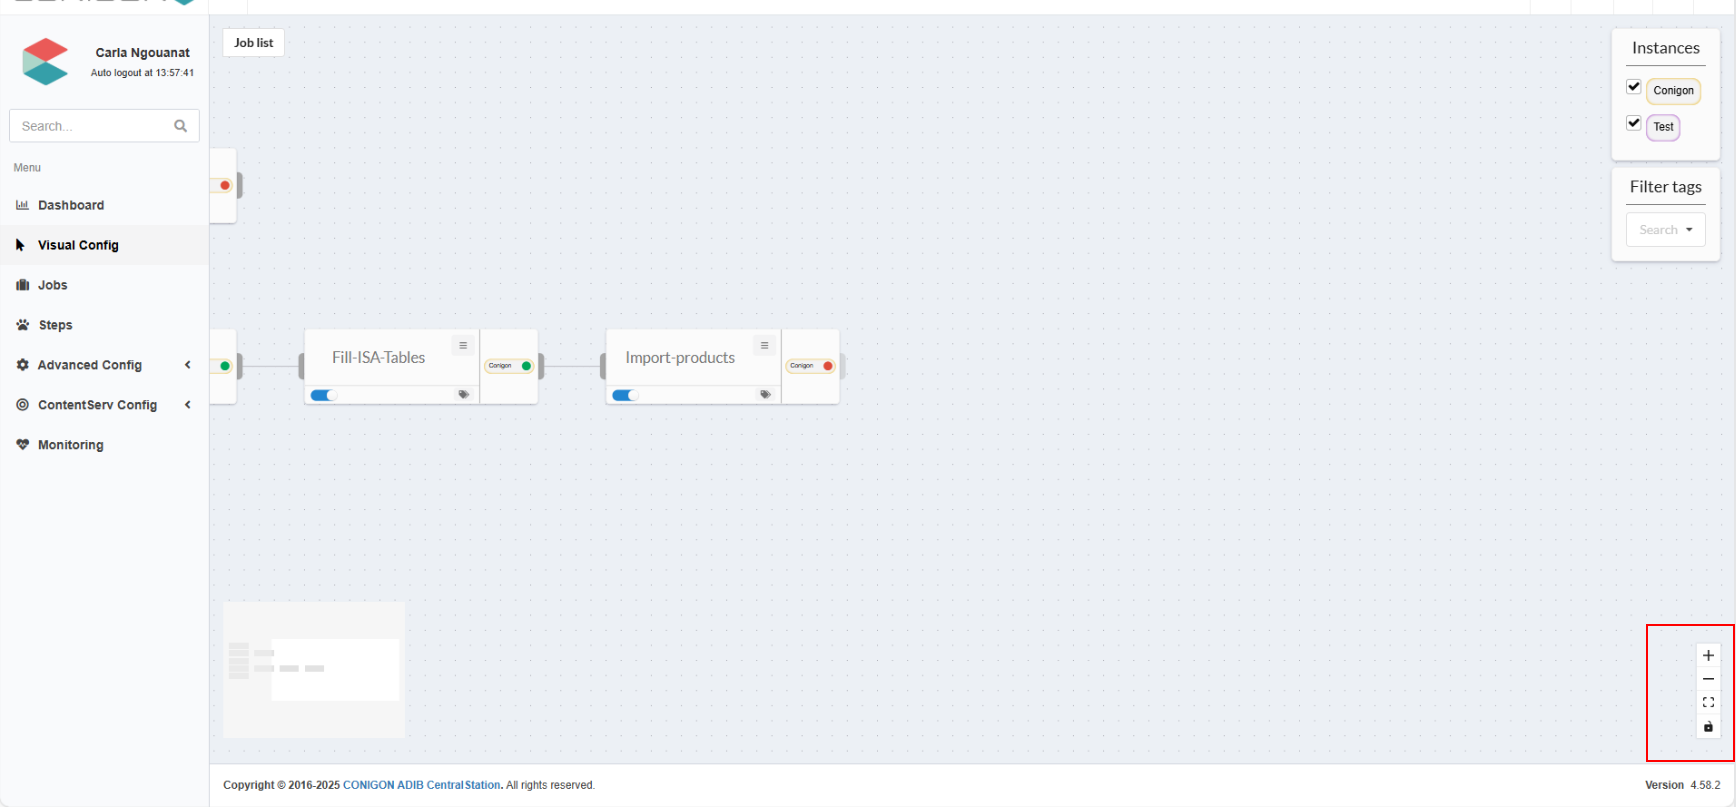
- Zoom and Navigation:
- Use the first three buttons or touchscreen gestures (pinch/spread) to zoom in/out.
- Locking/Unlocking Mode:
- Enables or disables the ability to connect Jobs or Steps together.
- Connecting Elements (Next Parameters):
- Hover over a designated area until the cursor turns into a "+", then click and drag to another Step or Job to establish the link. For example, the job Test is connected to the job Cloudstream (CS to ADIB), as shown in the following image
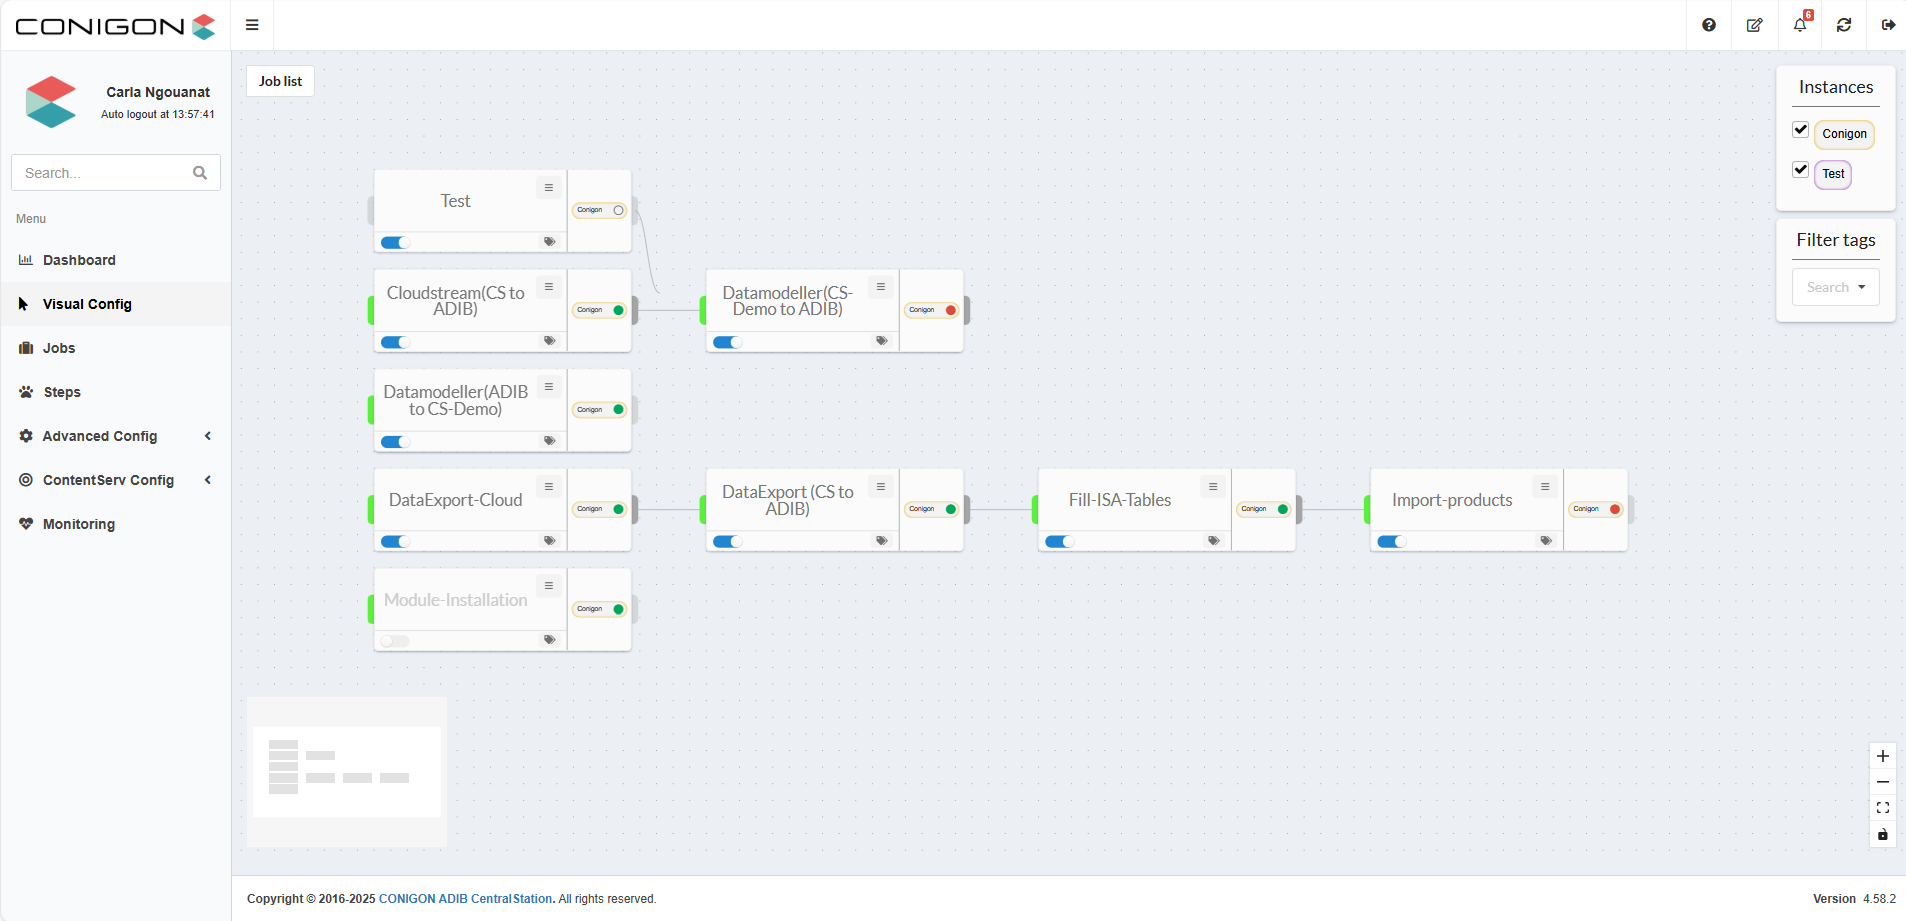
- Hover over a designated area until the cursor turns into a "+", then click and drag to another Step or Job to establish the link. For example, the job Test is connected to the job Cloudstream (CS to ADIB), as shown in the following image
4. Visualization
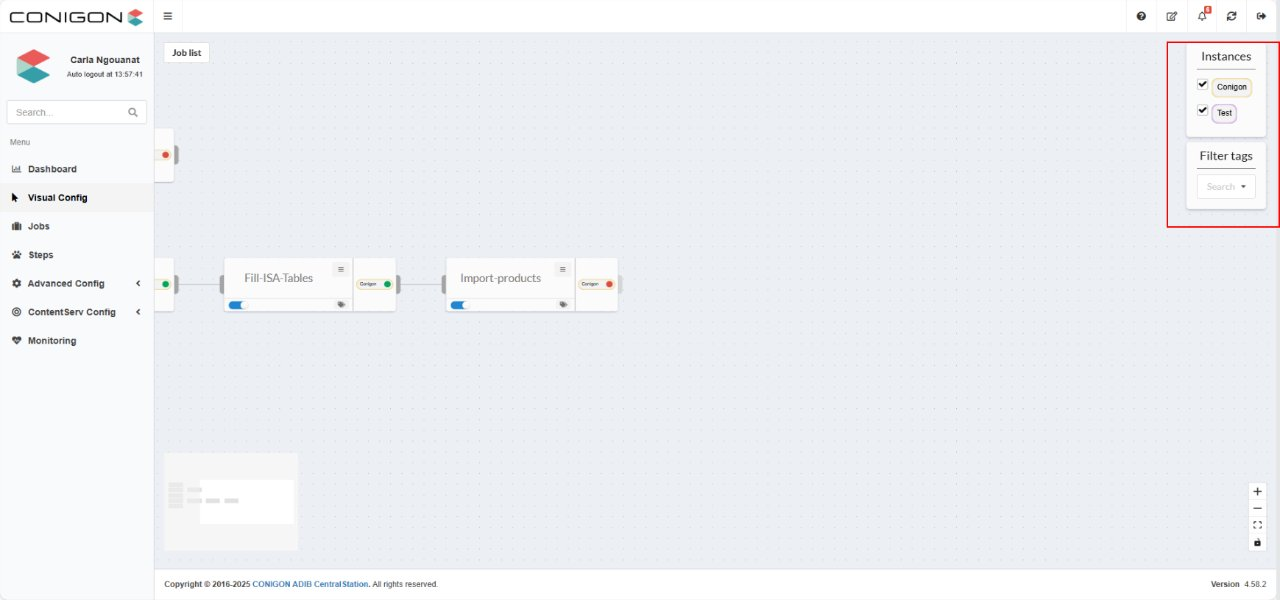
Filtering by Tags and Instances
Users can filter displayed elements (Jobs or Steps) using:
- Tags
- Instances, by checking the Jobs or Steps they wish to display